
Installing the Catch Navigator on the Trawl
About this task
Pull cords are attached to the net. When the net fills up and the meshes expand, cords are pulled and this triggers the catch sensor.
Procedure
-
Install the sensor on the top of the codend with the UP
side of the housing oriented toward the vessel. You can install a double-mesh
piece of netting to stabilize the sensor. Make sure there is nothing in front of
it that would block its signal.
Tip: If the meshes of the net obstruct the Catch Navigator signal, you can install the sensor inside the codend.
-
Securely attach the sensor to the net by its front and back attachment
lugs:
- We recommend to attach the front and back attachment lugs with rope. This prevents metal to metal contact and extends the life of the housing.
- When you attach the sensor, stretch the net codend at the point where you need the catch status to become full.
- Once installed, make sure that when the net is fully stretched out it does not cause stress on the attachments points.
-
Attach one end of each rubber strap to the pull cords of the sensor, and the
other ends to the net. Make sure the pull cords are taut enough to trigger when
the net is full, but loose enough not to trigger when the net is empty.
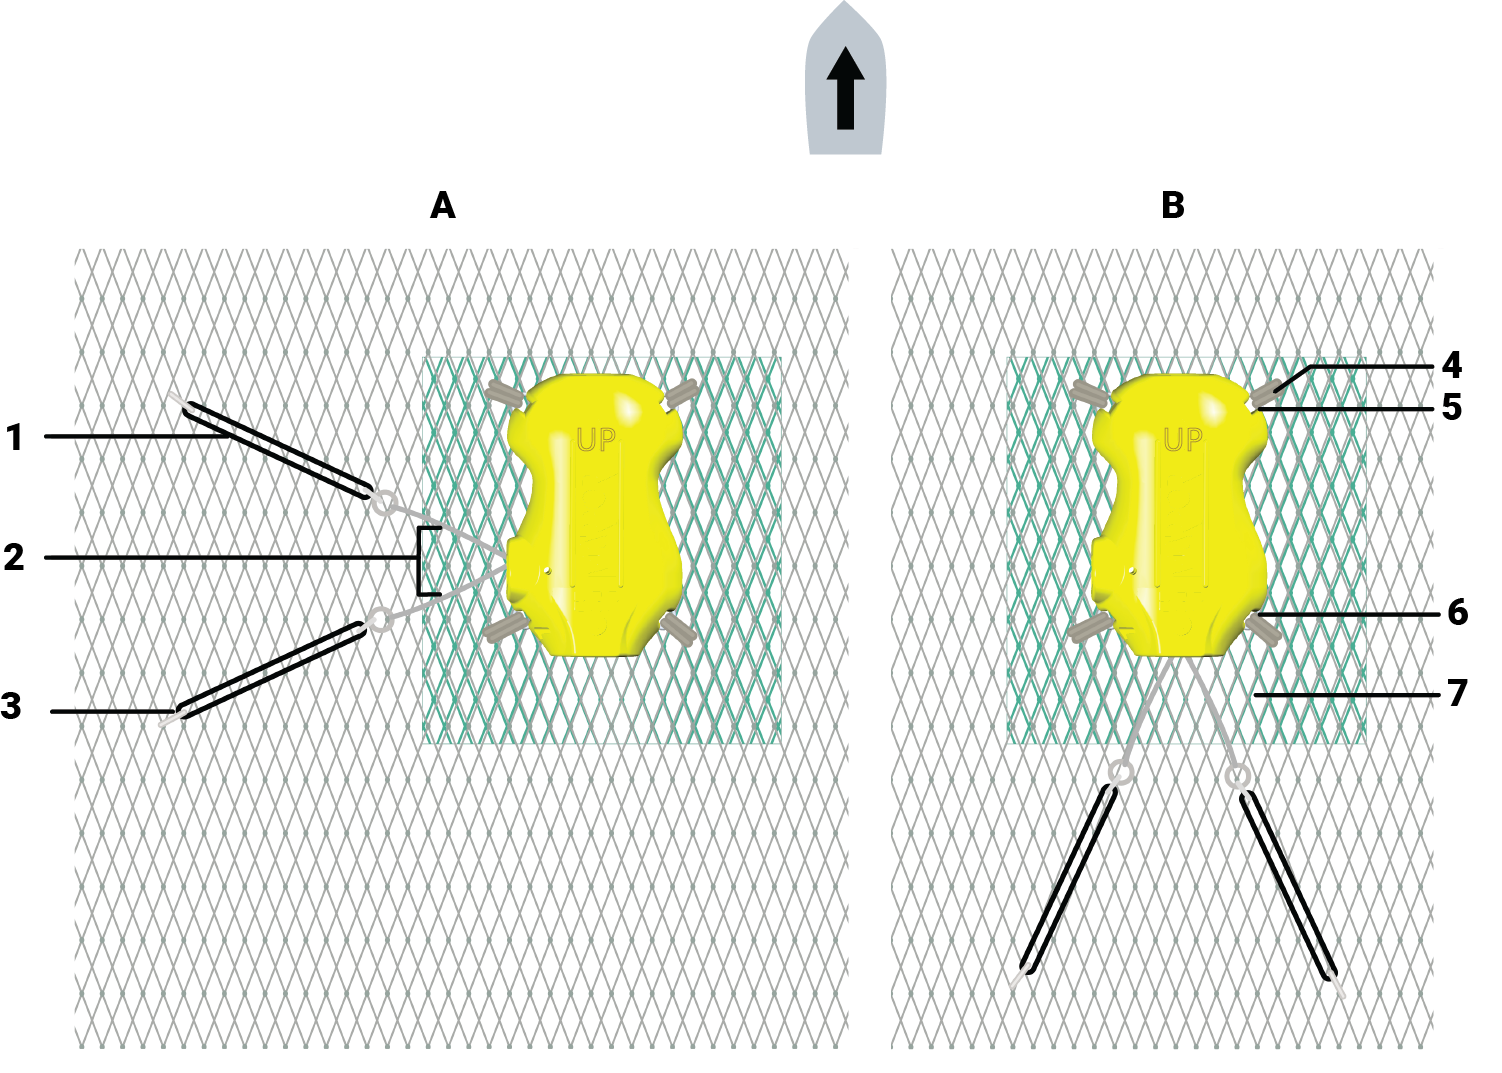
A. Side-pull B. Center-pull
1. Rubber strap
2. Pull cords
3. Snap hook
4. Knot with rope
5. Front attachment lug
6. Back attachment lug
7. Double-mesh piece of netting for stabilization