Calibrating the Sensor for Target Strength Value
Door Sounder sensor with target strength calibration need to be calibrated to offset the variability of the sensor transducer and of sound transmission. The aim is to have all sensors displaying the same target strength value (echogram color) for a given target.
Setting Up the Installation
Before you begin
- Make sure you have correctly configured the sensor settings, especially the noise floor level, TVG mode, ping length and ping frequency.
- You can calibrate the sensor with or without the housing on.
- You need a cable extension to immerse the sensor and connect it to Mosa2 with the Configuration Cable.
Important: If
you change the pulse length or frequency on a calibrated sensor, you need to
calibrate it again.
Procedure
-
Set up the following installation.
See .
- Water needs to be still.
- Use a very thin fishing line (0.1 mm thick) to hold the ping pong ball.
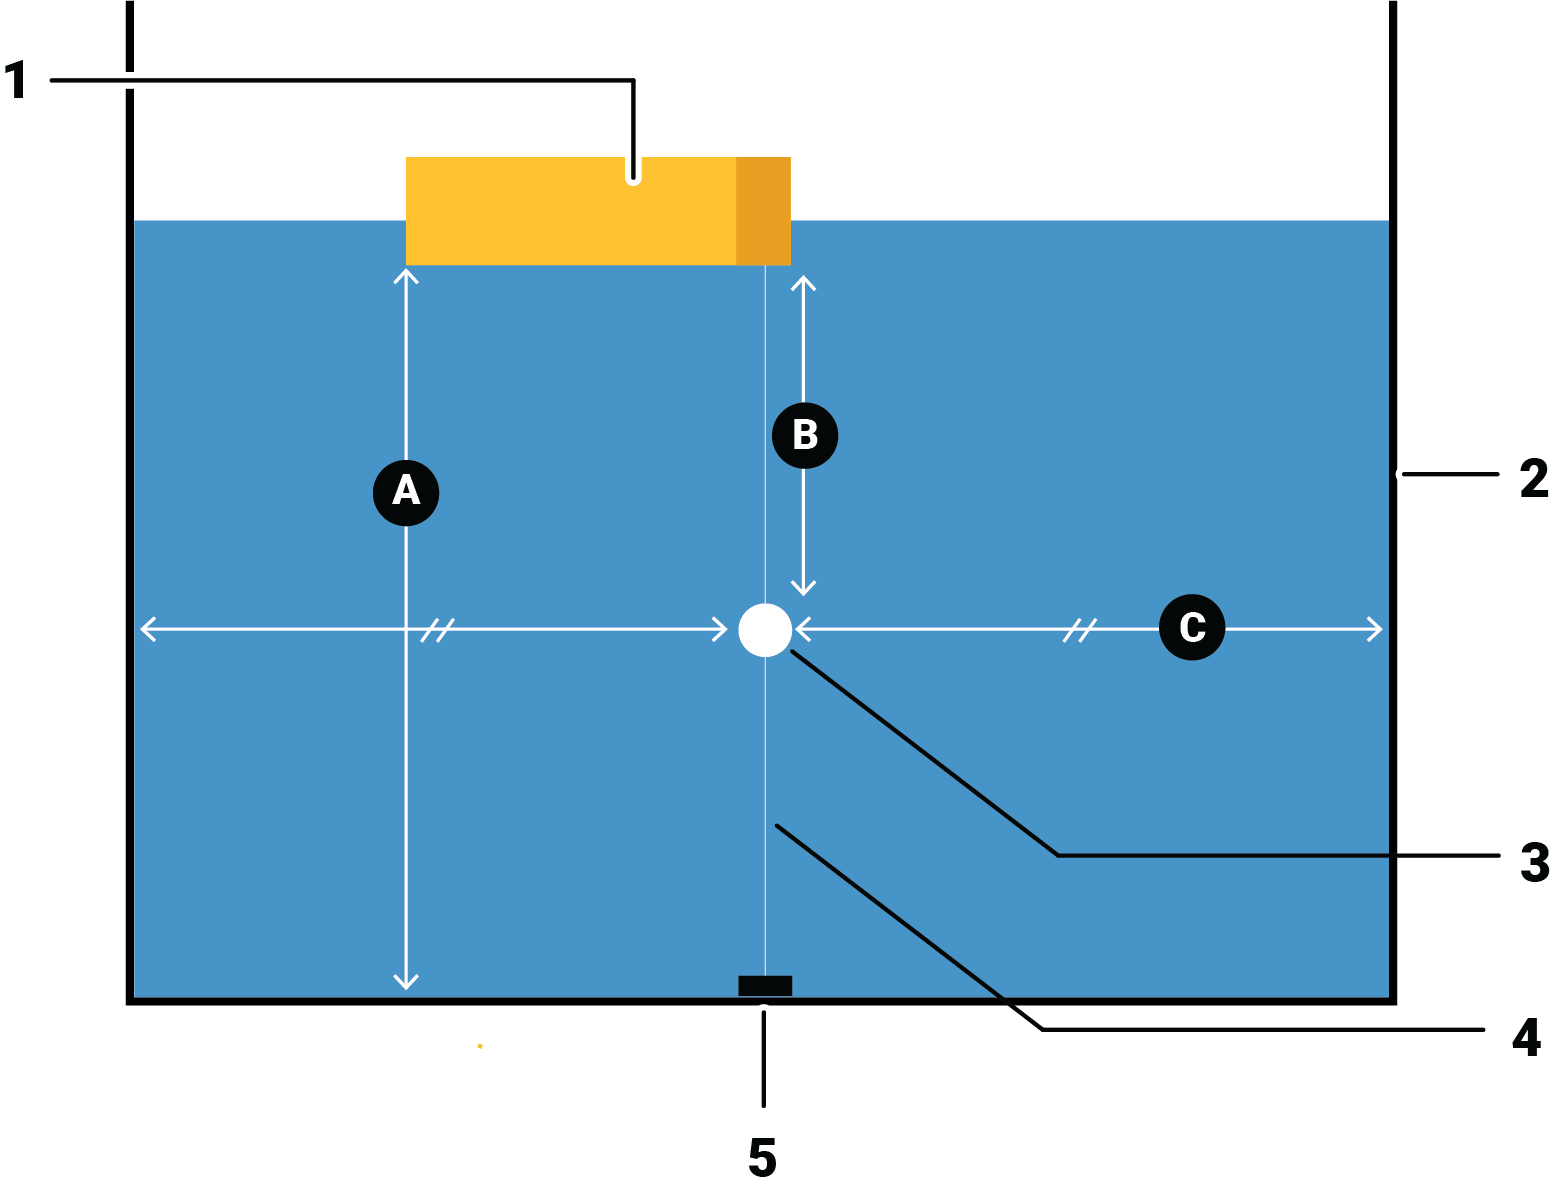
1. Sensor, half in water 2. Water tank
3. Ping pong ball
4. Fishing line
5. Counterweight
Recommended lengths A. Min. 150 cm.
B. Distance to target = 50 cm.
C. Min. 75 cm between ball and side walls.
-
Before putting the sensor in water:
- Activate and deactivate the water switch to connect the sensor to Mosa2 via a wireless signal.
Calibrating the Sensor in Mosa2
Procedure
-
From Mosa2, click Menu
 > Expert and enter the password copernic.
-
Go to the tab Trawl Explorer.

- Go to Ping Down Calibration (if the sounding mode is Down 1 + Down 2, you will repeat the calibration in Ping Down2 Calibration).
- Check that the target strength is the one applicable to your target. In this example, it is -39 dB (target strength value of a ping pong ball of 39 mm diameter).
-
Check that the pitch and roll of the sensor is
between - 5° and 5° to be sure that the beam direction of the sensor is
vertical down:
- Click the tab Pitch and Roll.
- From Accelerometer Test, click Apply.
-
From the bottom of the screen, click Send ping to send one ping that will
identify the distance to the target.
Note: The distance displayed in Max TS level is 15 to 35 cm more than the actual distance, depending on the ping length (here it is 25 cm for a ping length of 0.4 ms).A curve is displayed. The red horizontal line indicates the target strength and the red vertical line indicates the distance. They must cross at the top of the first curve, corresponding to the ping pong ball. If not, click the vertical line and drag it to the top of the curve. Press up and down arrows on your keyboard to move it with more precision.
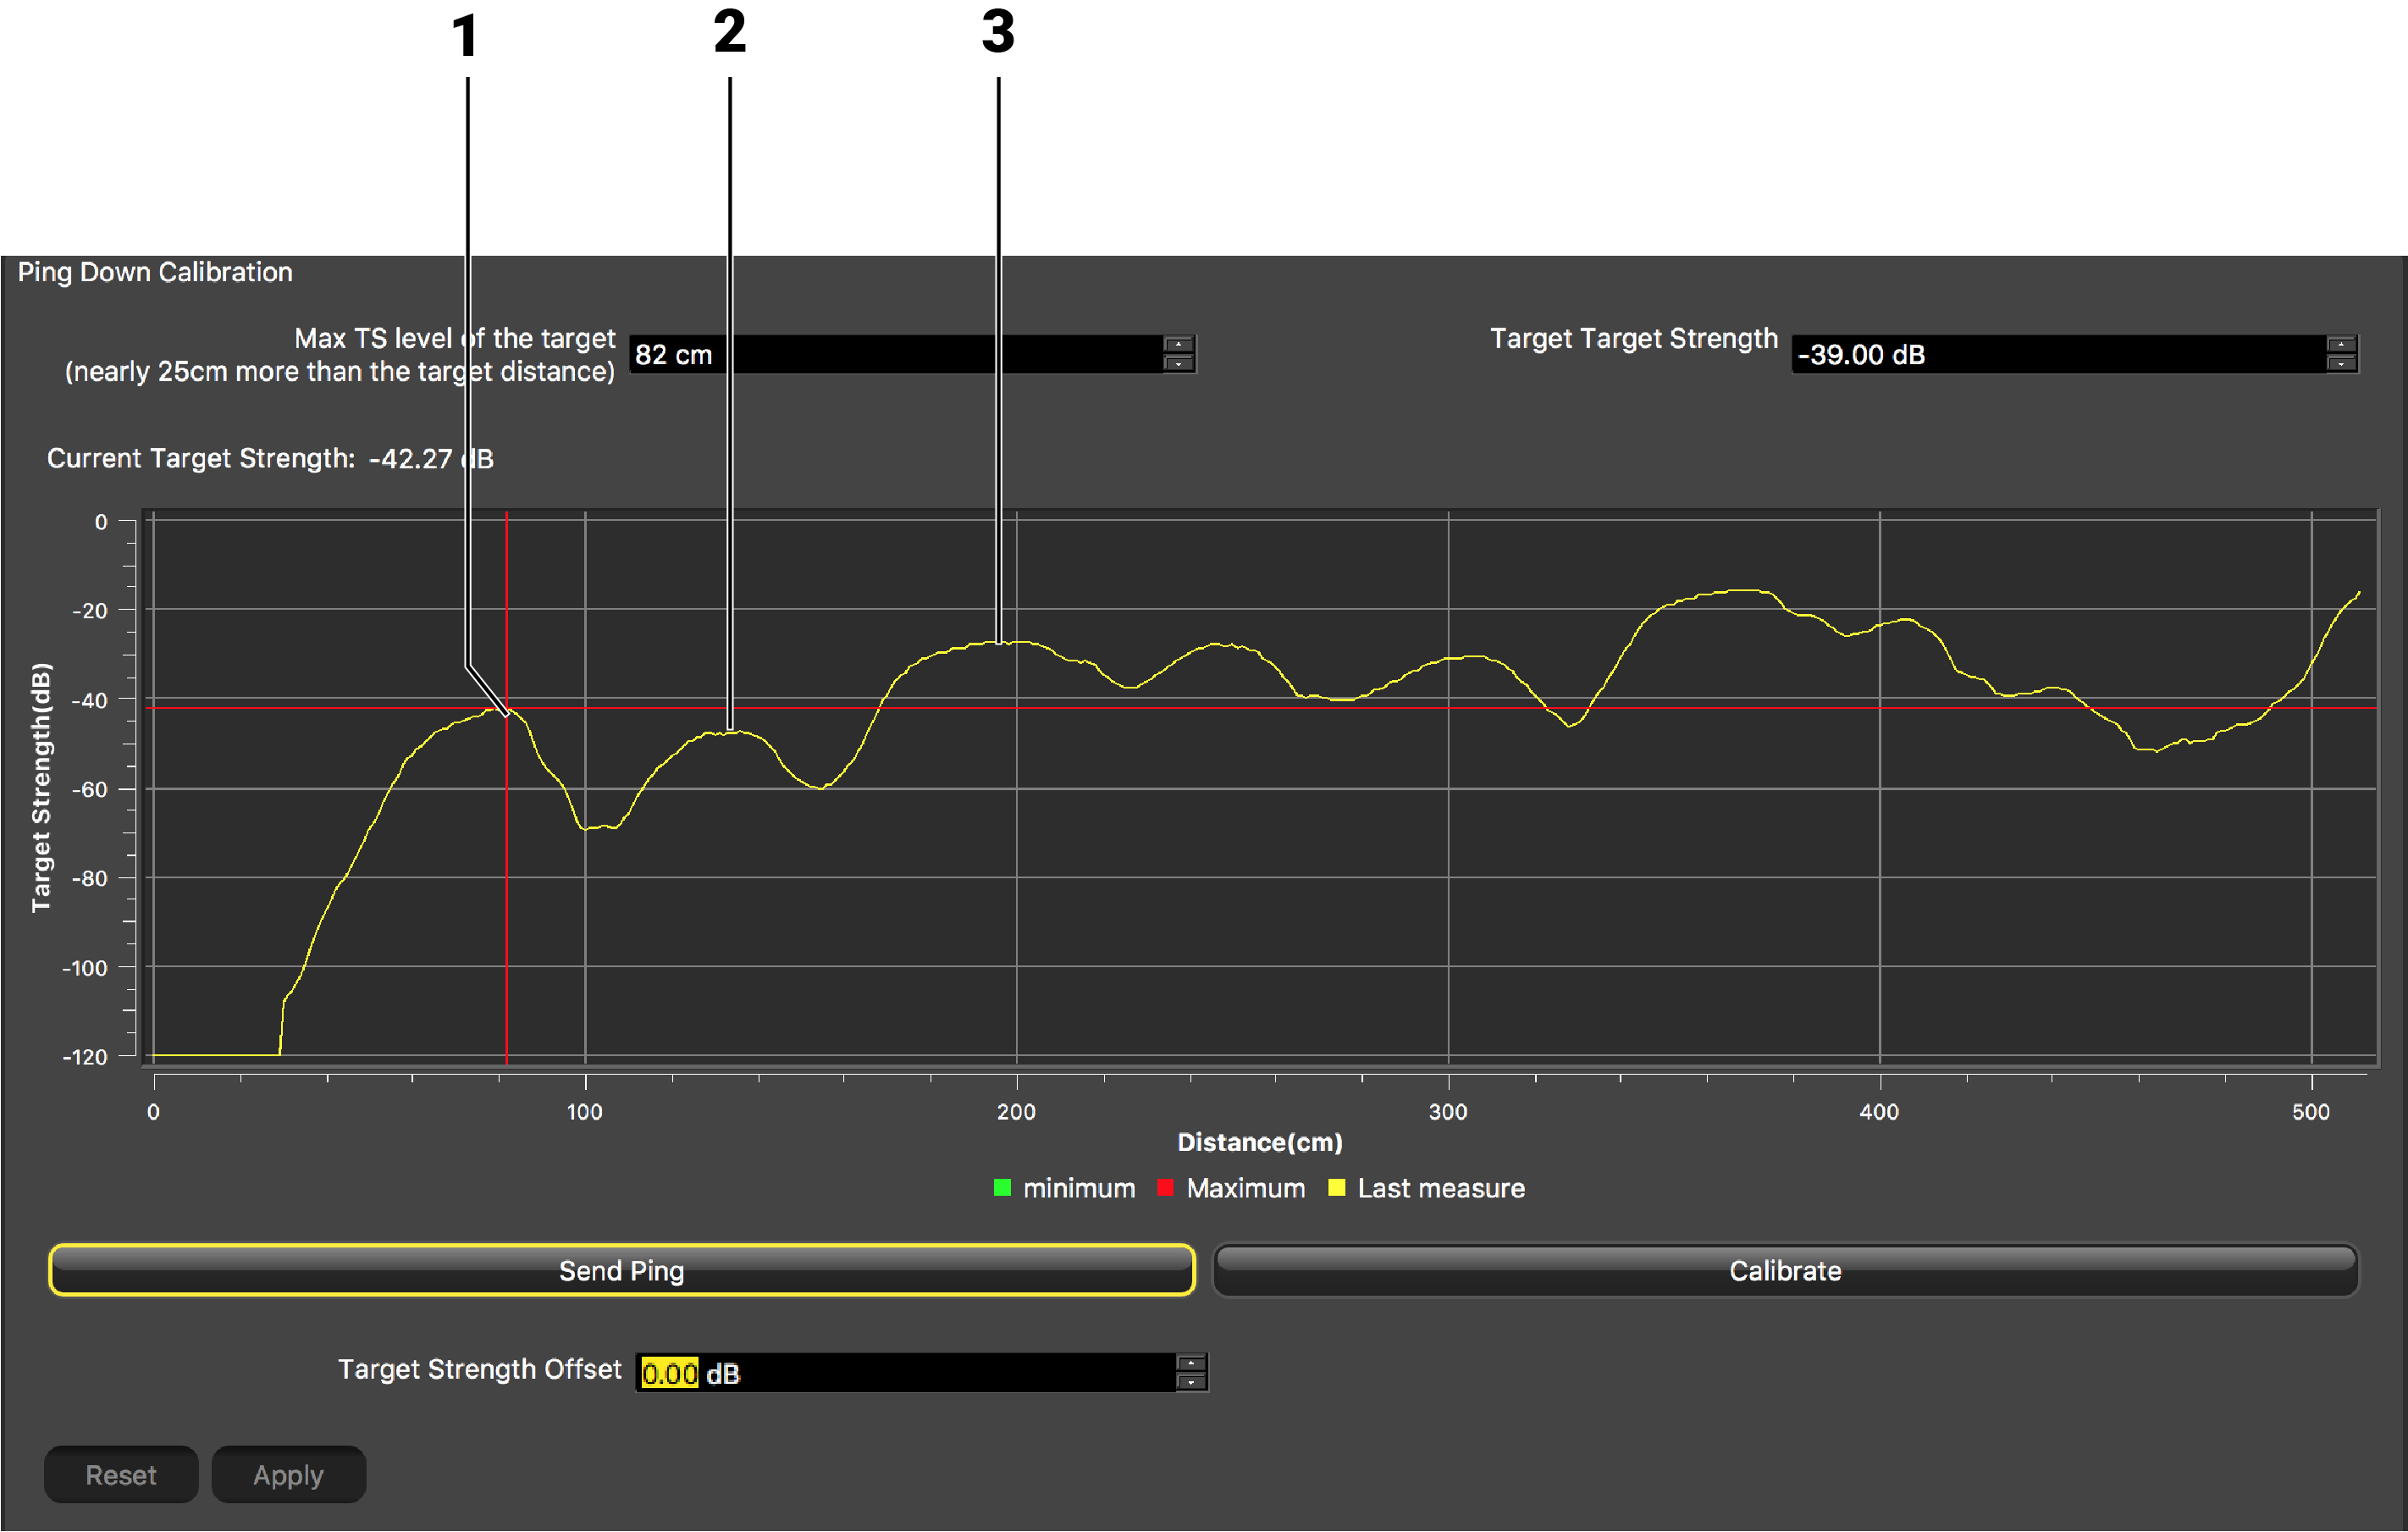
1. Ping pong ball / 2. Side lobes (tank walls) /3. Bottom -
From the bottom of the screen, click Calibrate.
Note: If the sensor is not correctly placed, you may have an error message asking you to correct the pitch and/or roll angle.The sensor sends a series of 5 pings to calculate if the echo is consistent and constant. A new target strength offset is calculated.
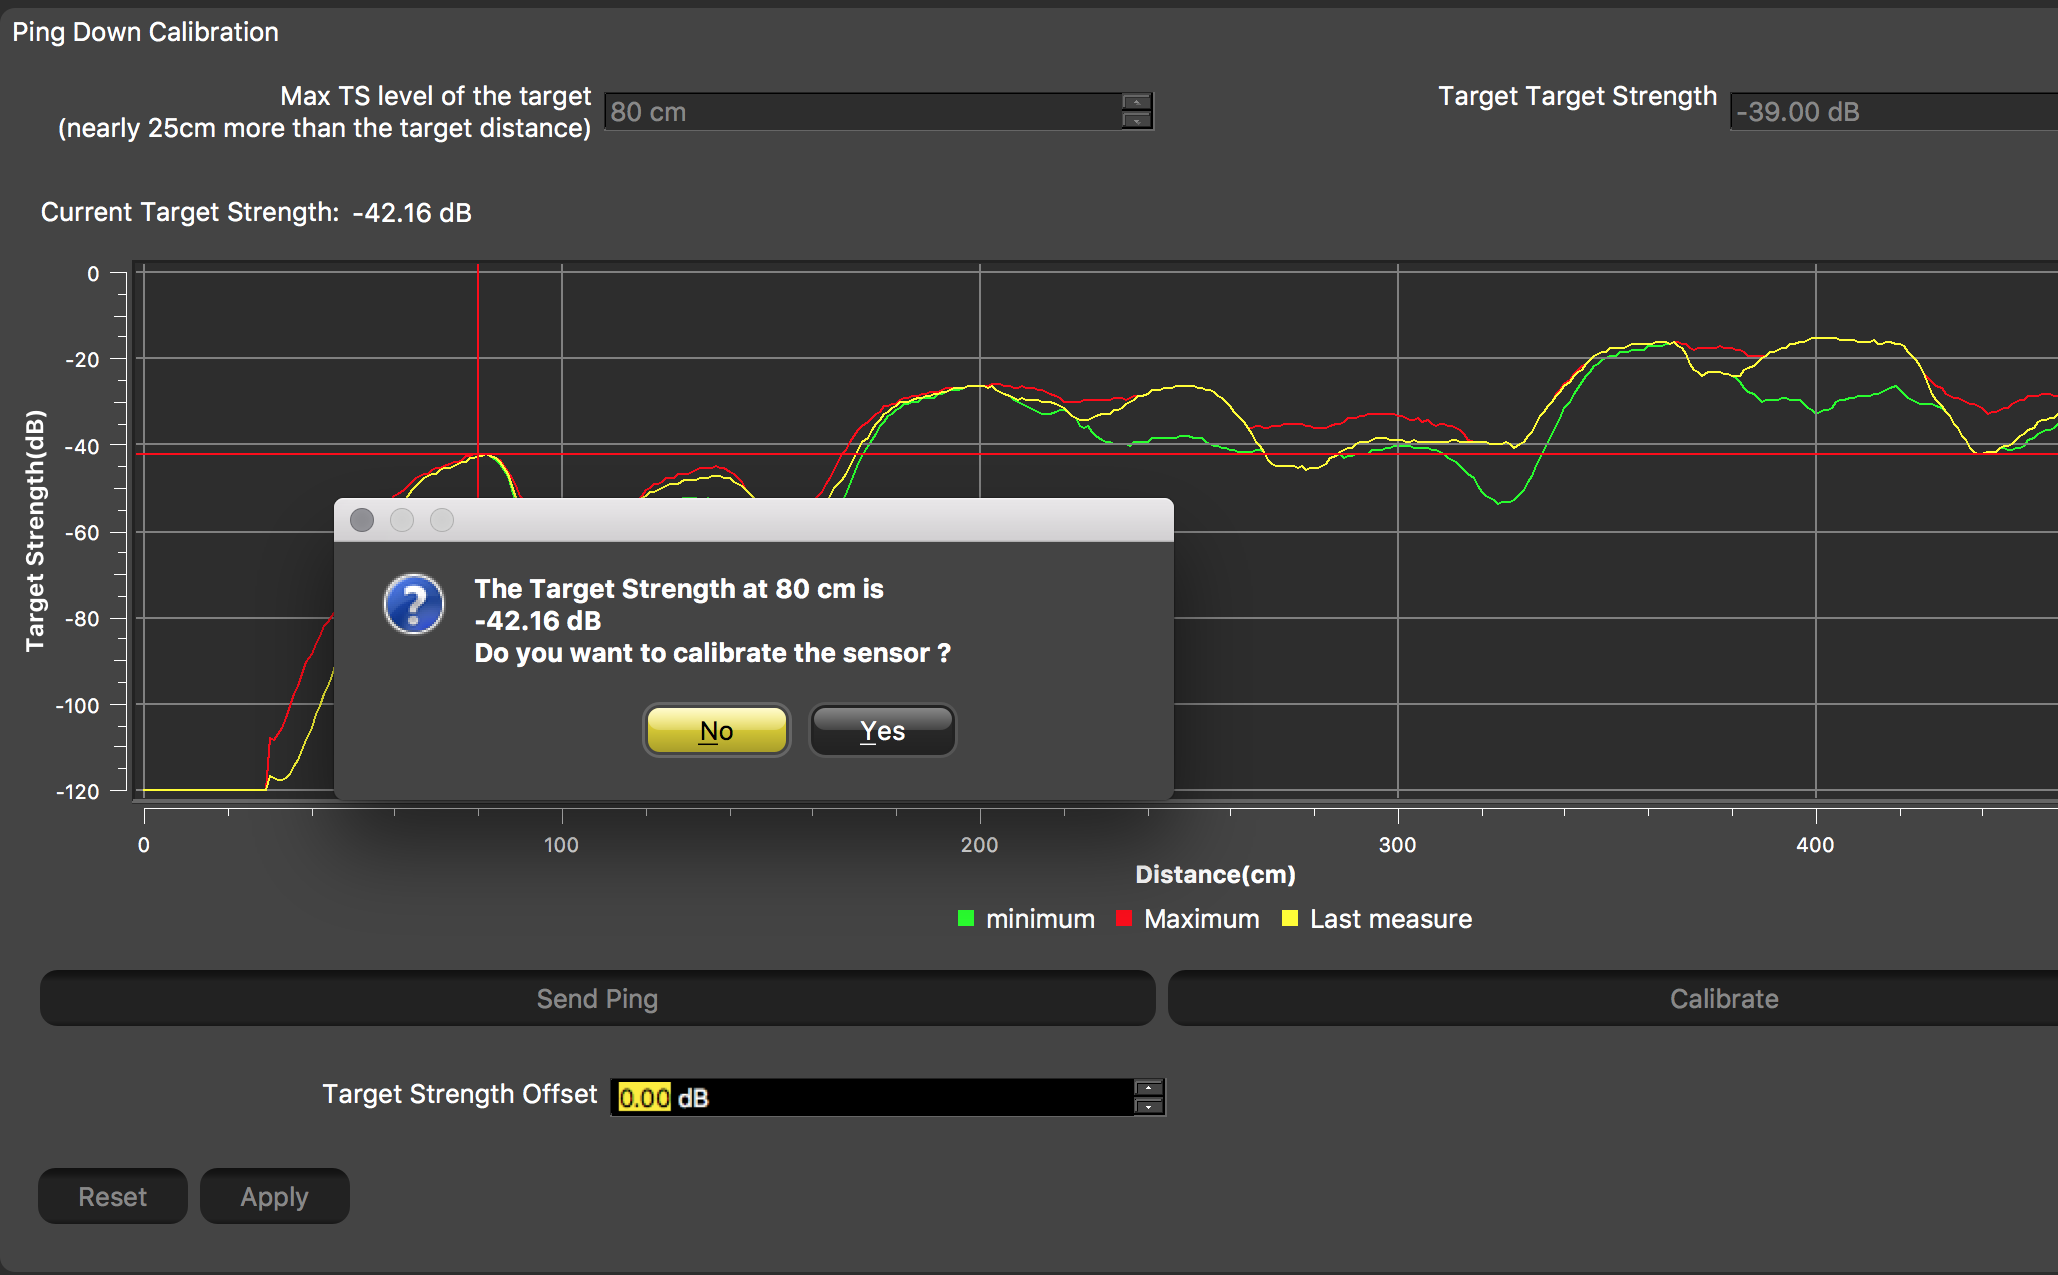
-
Accept the new calibration settings suggested in the
dialog box. The target strength
offset is auto-populated.
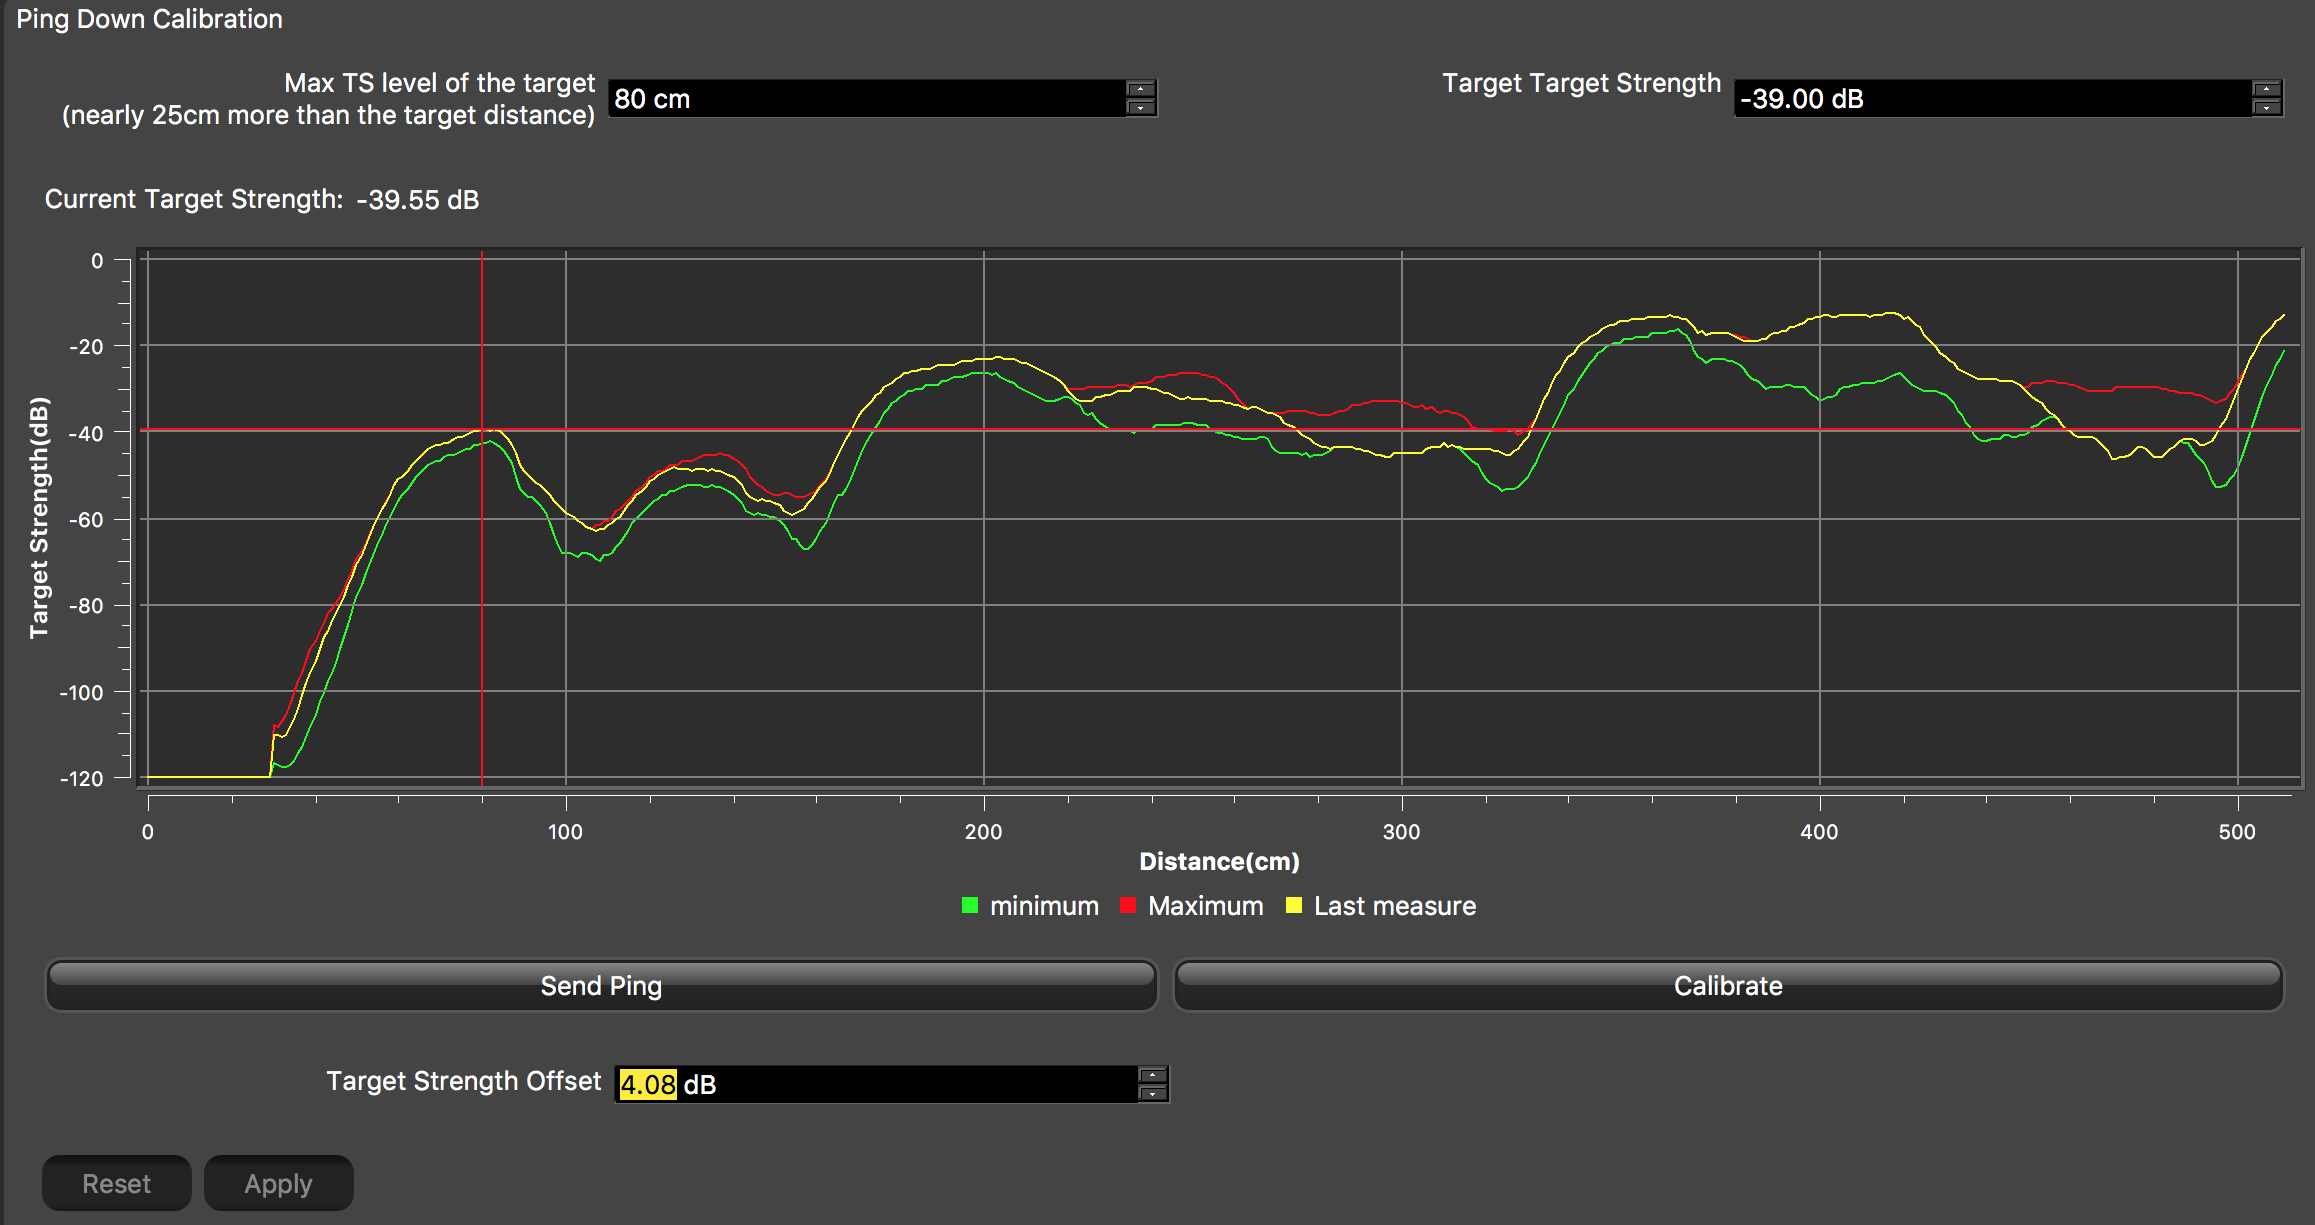
The sensor sends 1 ping to check if the calibration settings are correct in comparison to the target strength set (e.g. -39 dB). If they are correct, calibration settings are saved.
If calibration settings are not correct, check:- the pitch and roll
- the installation in the water tank
Troubleshooting: If the sensor LED do not seem to work correctly right after the calibration procedure it is normal: calibrating influences LED display. Activate and deactivate the water-switch. - Click Apply to save the offset.
- Click Send ping to check the target strength of the ball.
-
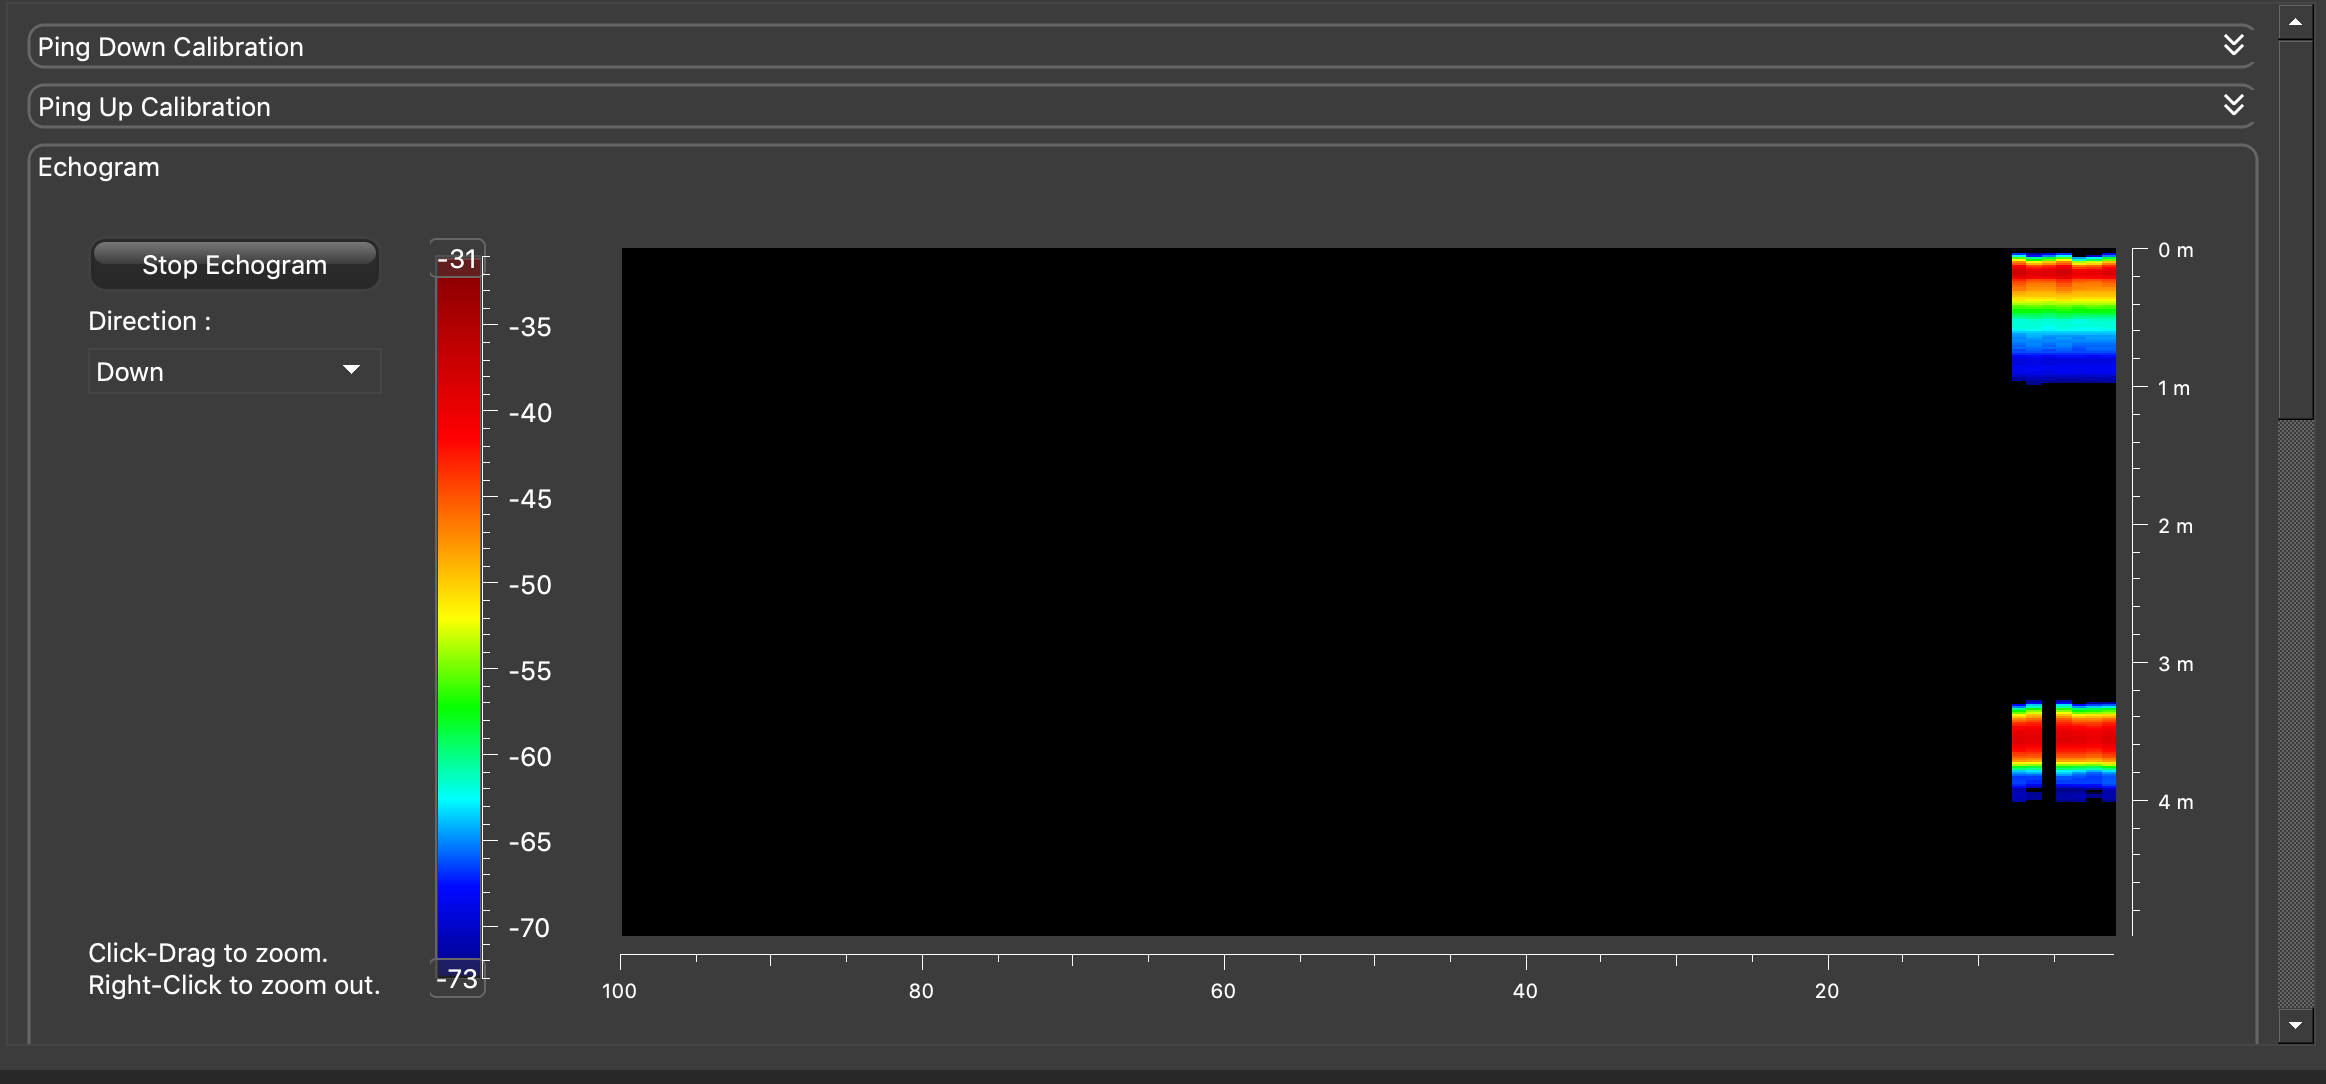
Click Echogram
to check that you see an echo on the echogram image.
- Click Reset to come back to the last saved configuration and check that the offset has been saved.