Installing the Catch Navigator NX
Follow these guidelines to install a Catch Navigator NX on the trawl gear.
About this task
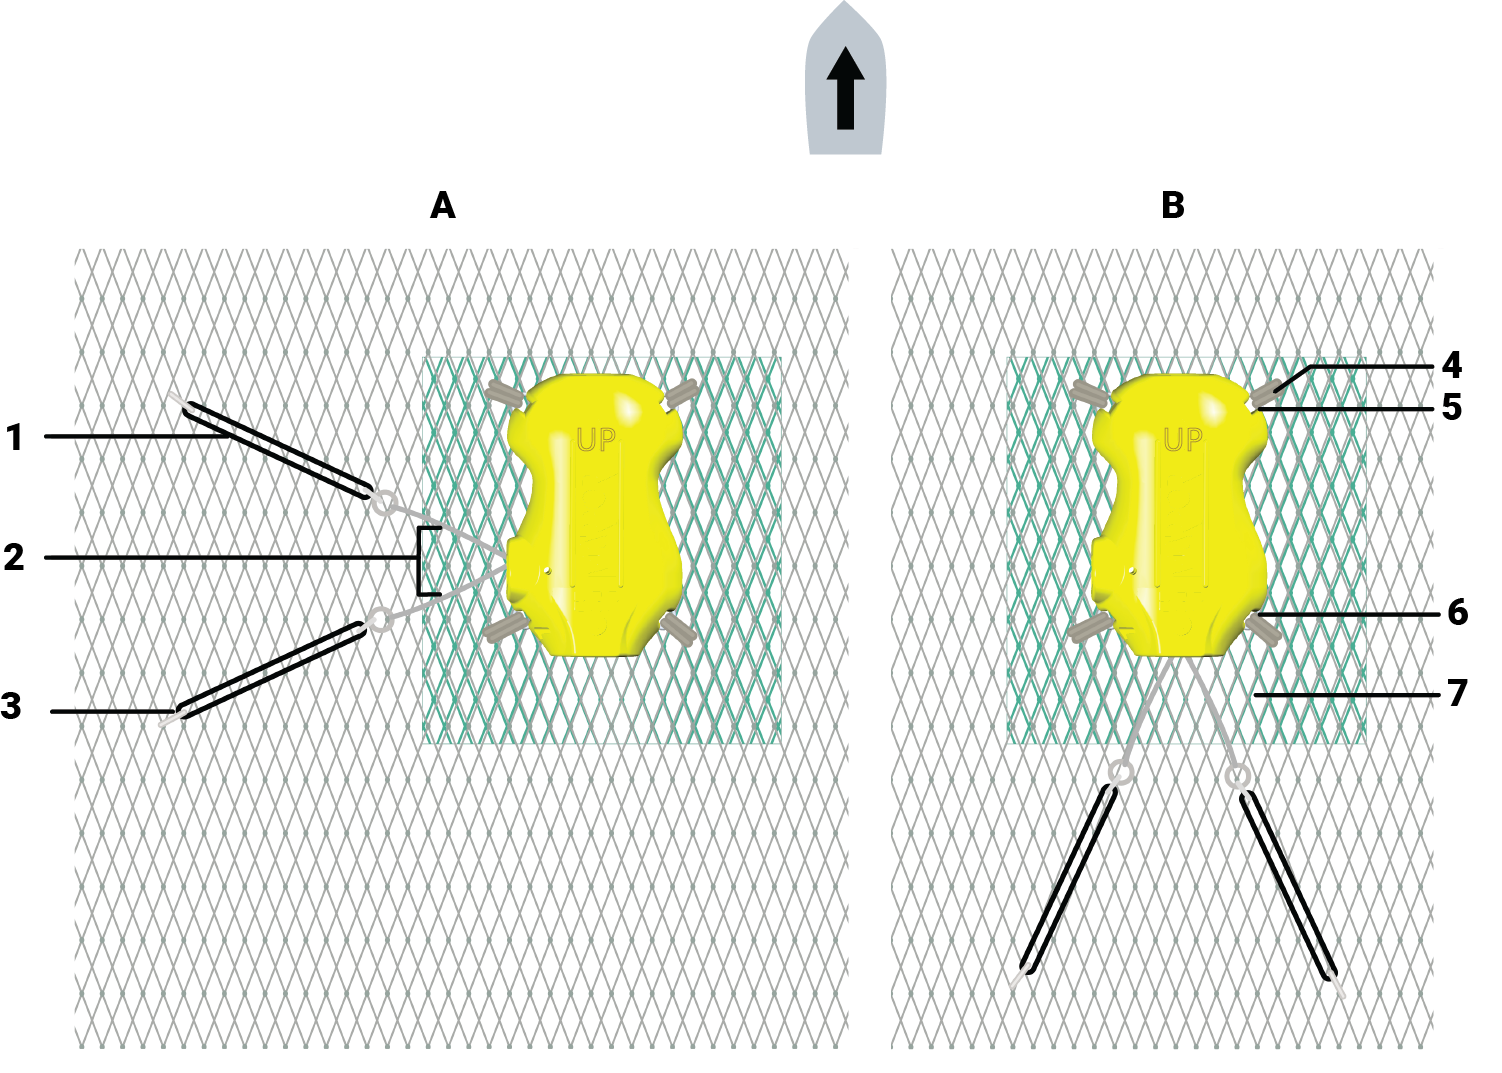
Sensors can be installed with the pull cords on the side or on the center of the sensor.
Pull cords are attached to the net. When the net fills up and the meshes expand, cords are pulled and this triggers the catch sensor.
Procedure
-
Install the sensor on the top of the codend with the UP side of the housing oriented toward the vessel.
You can install a double-mesh piece of netting to stabilize the sensor.
Make sure there is nothing in front of it that would block its signal.
- Securely attach the sensor to the net by its front and back attachment lugs:
- If you use a stabilization board:
-
Attach one end of each rubber strap to the pull cords of the sensor, and the other ends to the net.
Make sure the pull cords are taut enough to trigger when the net is full, but loose enough not to trigger when the net is empty.
NX

Small (legacy)
A. Side-pull B. Center-pull
1. Rubber strap
2. Pull cords
3. Snap hook
4. Knot with rope
5. Front attachment lug
6. Back attachment lug
7. Double-mesh piece of netting for stabilization
Example of installation.
1. Knot with rope 2. Stabilization board
3. Mounting strap
4. Rubber strap

-
Install several sensors on the codend to better follow the filling
processes. The sensors will trigger one by one, according to the amount of fish
inside the codend. After a few tows, you can estimate the amount of tonnage of fish
that you have depending on whether one, two or three sensors display a full
status.
