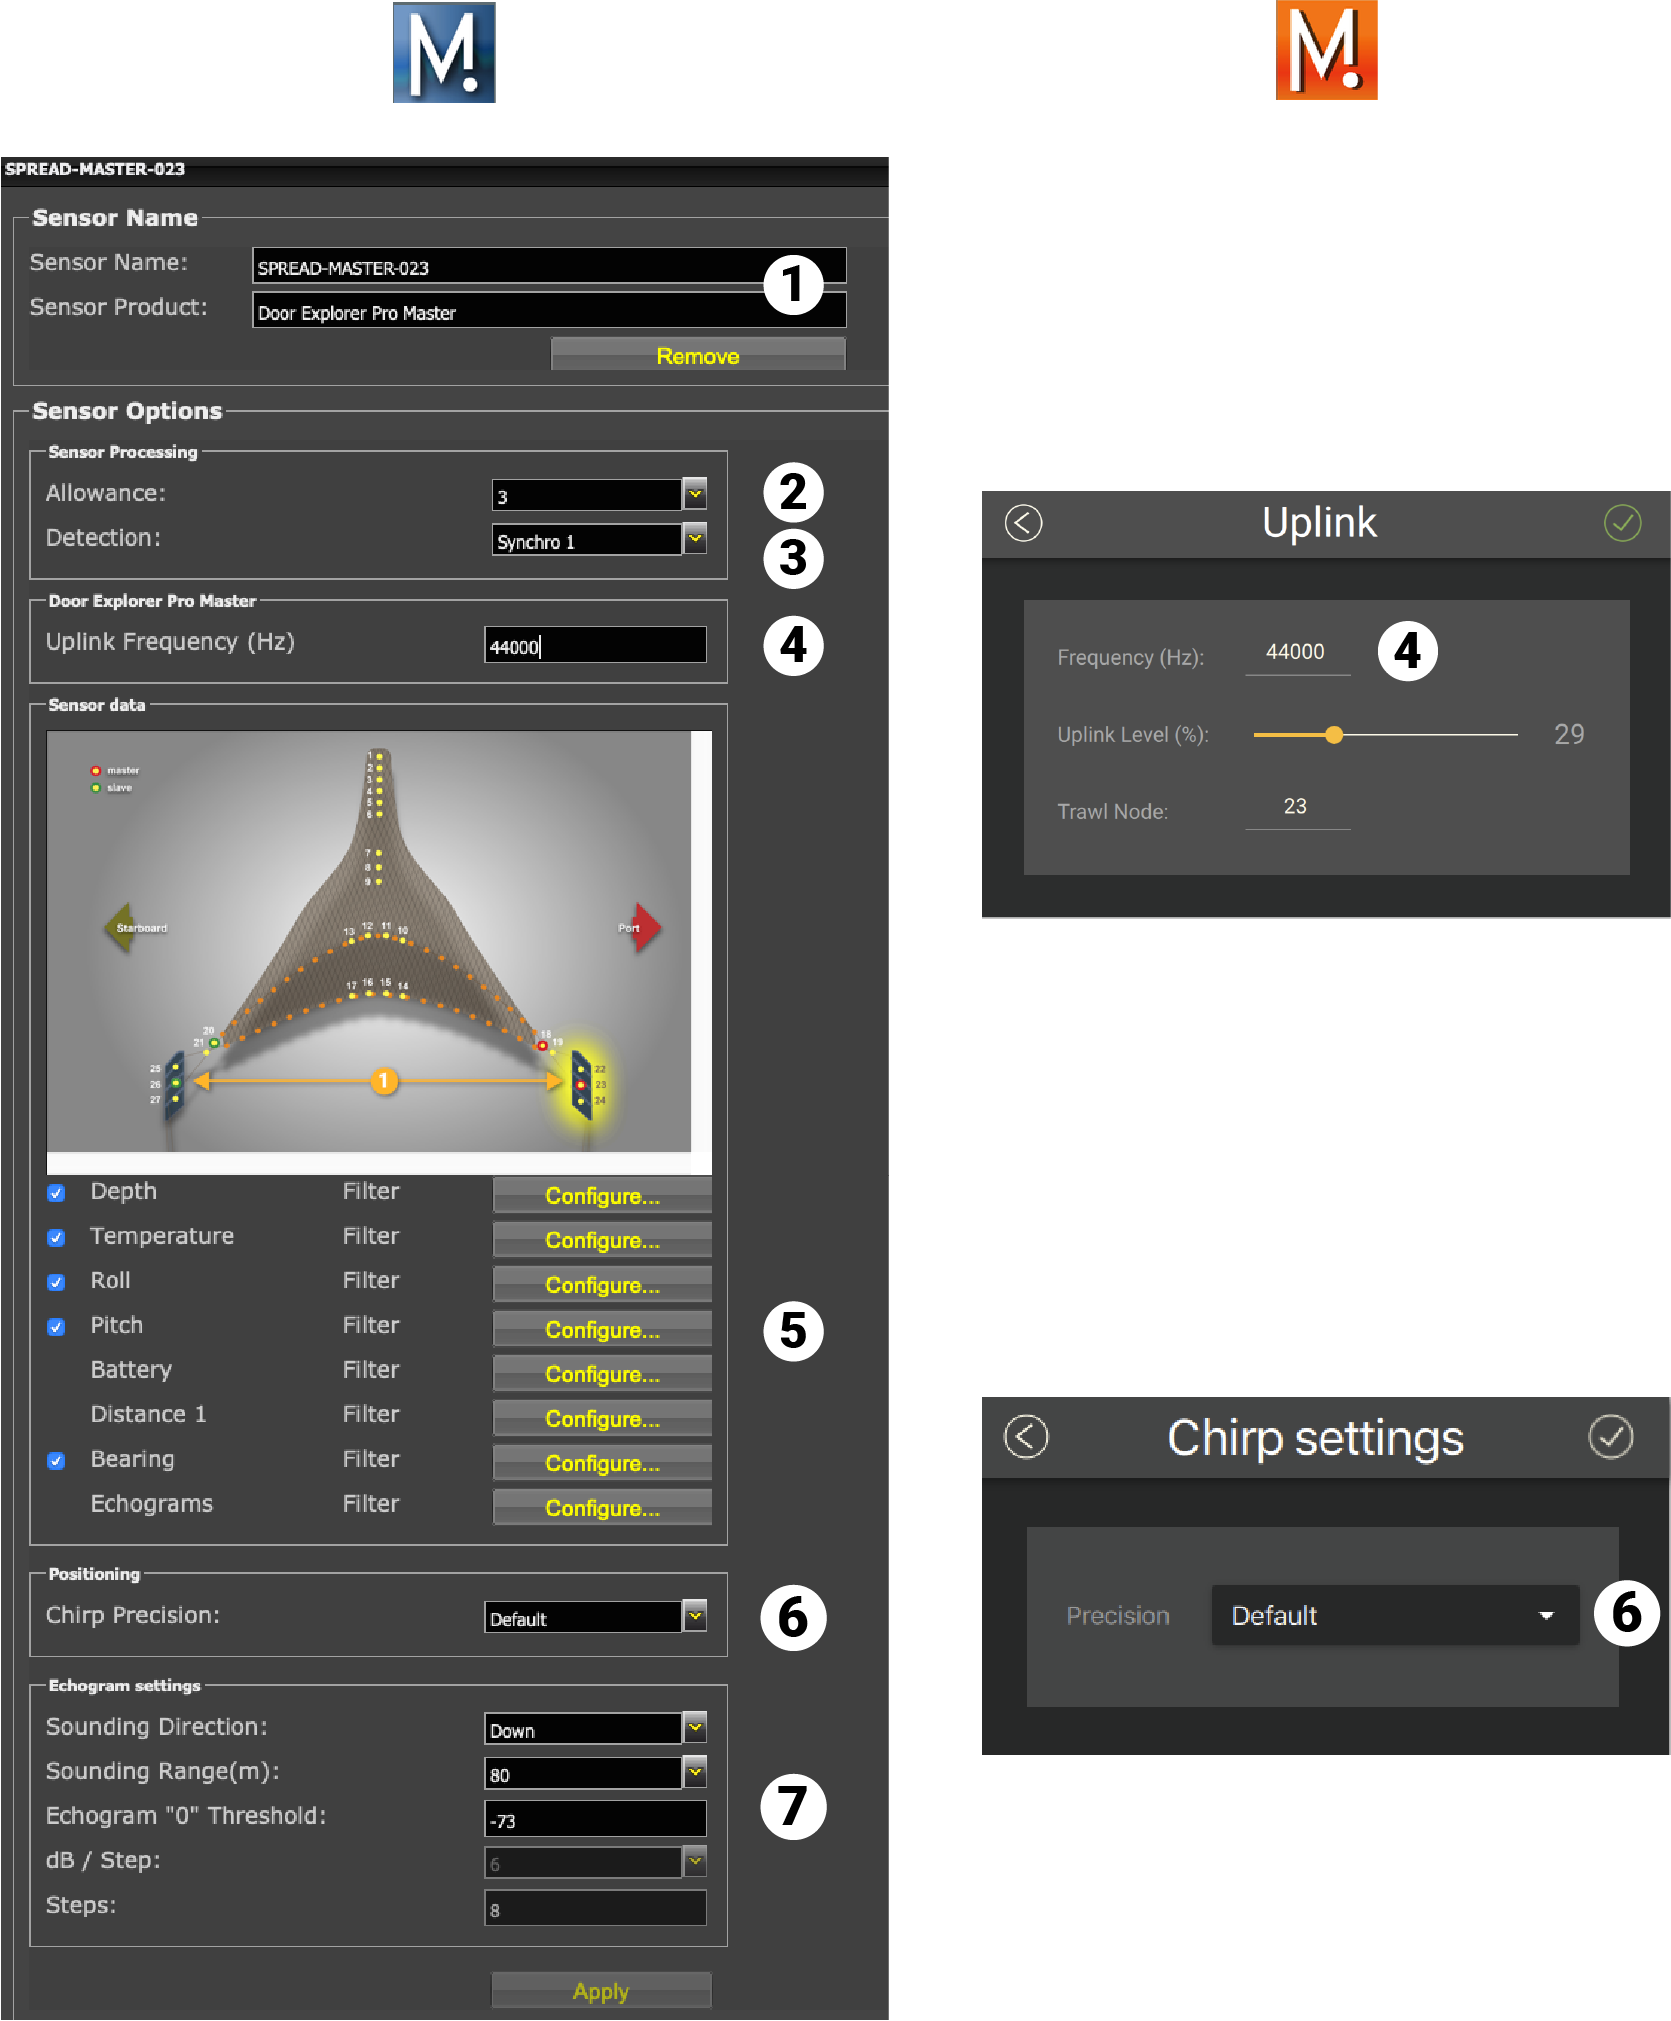
Configuring Sensor Settings
You need to complete communication settings when you add the sensor to the receiver.
Important: Make sure the settings you enter here are the same
as in Mosa2.

| 1 | Sensor name displayed in Scala2 and its features. |
| 2 | This setting helps detecting the signal of the sensor among other sensor or echosounder
signals. Change default setting only if you have issues receiving data.
|
| 3 | This setting also helps detecting the sensor signal. Leave default setting at Synchro 1. |
| 4 | Enter the same frequency as the one entered for the uplink frequency in Mosa2. |
| 5 | Click Configure to change filters
applied on incoming data. Filters are particularly useful to
reduce interferences on the Door Explorer echogram
data. Tip: Please refer to Scala2 user
guide for more information about the filters. |
| 6 | Select the same chirp precision as the one set in Mosa2. |
| 7 | Door Explorer only: do not change these settings. |
What to do next
Configure the positioning settings if the sensor has the positioning option.
