Configuring the Sensor Display on Scala2
You can display Trawl Explorer measurements (e.g. echogram, depth, temperature,...) on pages in Scala2. For V3 version of the sensor, you can also display target strength data, that help you identify fish.
About this task
Trawl Explorer
measurements are displayed in the control panels, in Mx. Data title should be Trawl
Explorer followed by the node where the Trawl Explorer was
placed when added to the system. Data displayed (e.g. depth, temperature, pitch
& roll) depend on the firmware installed.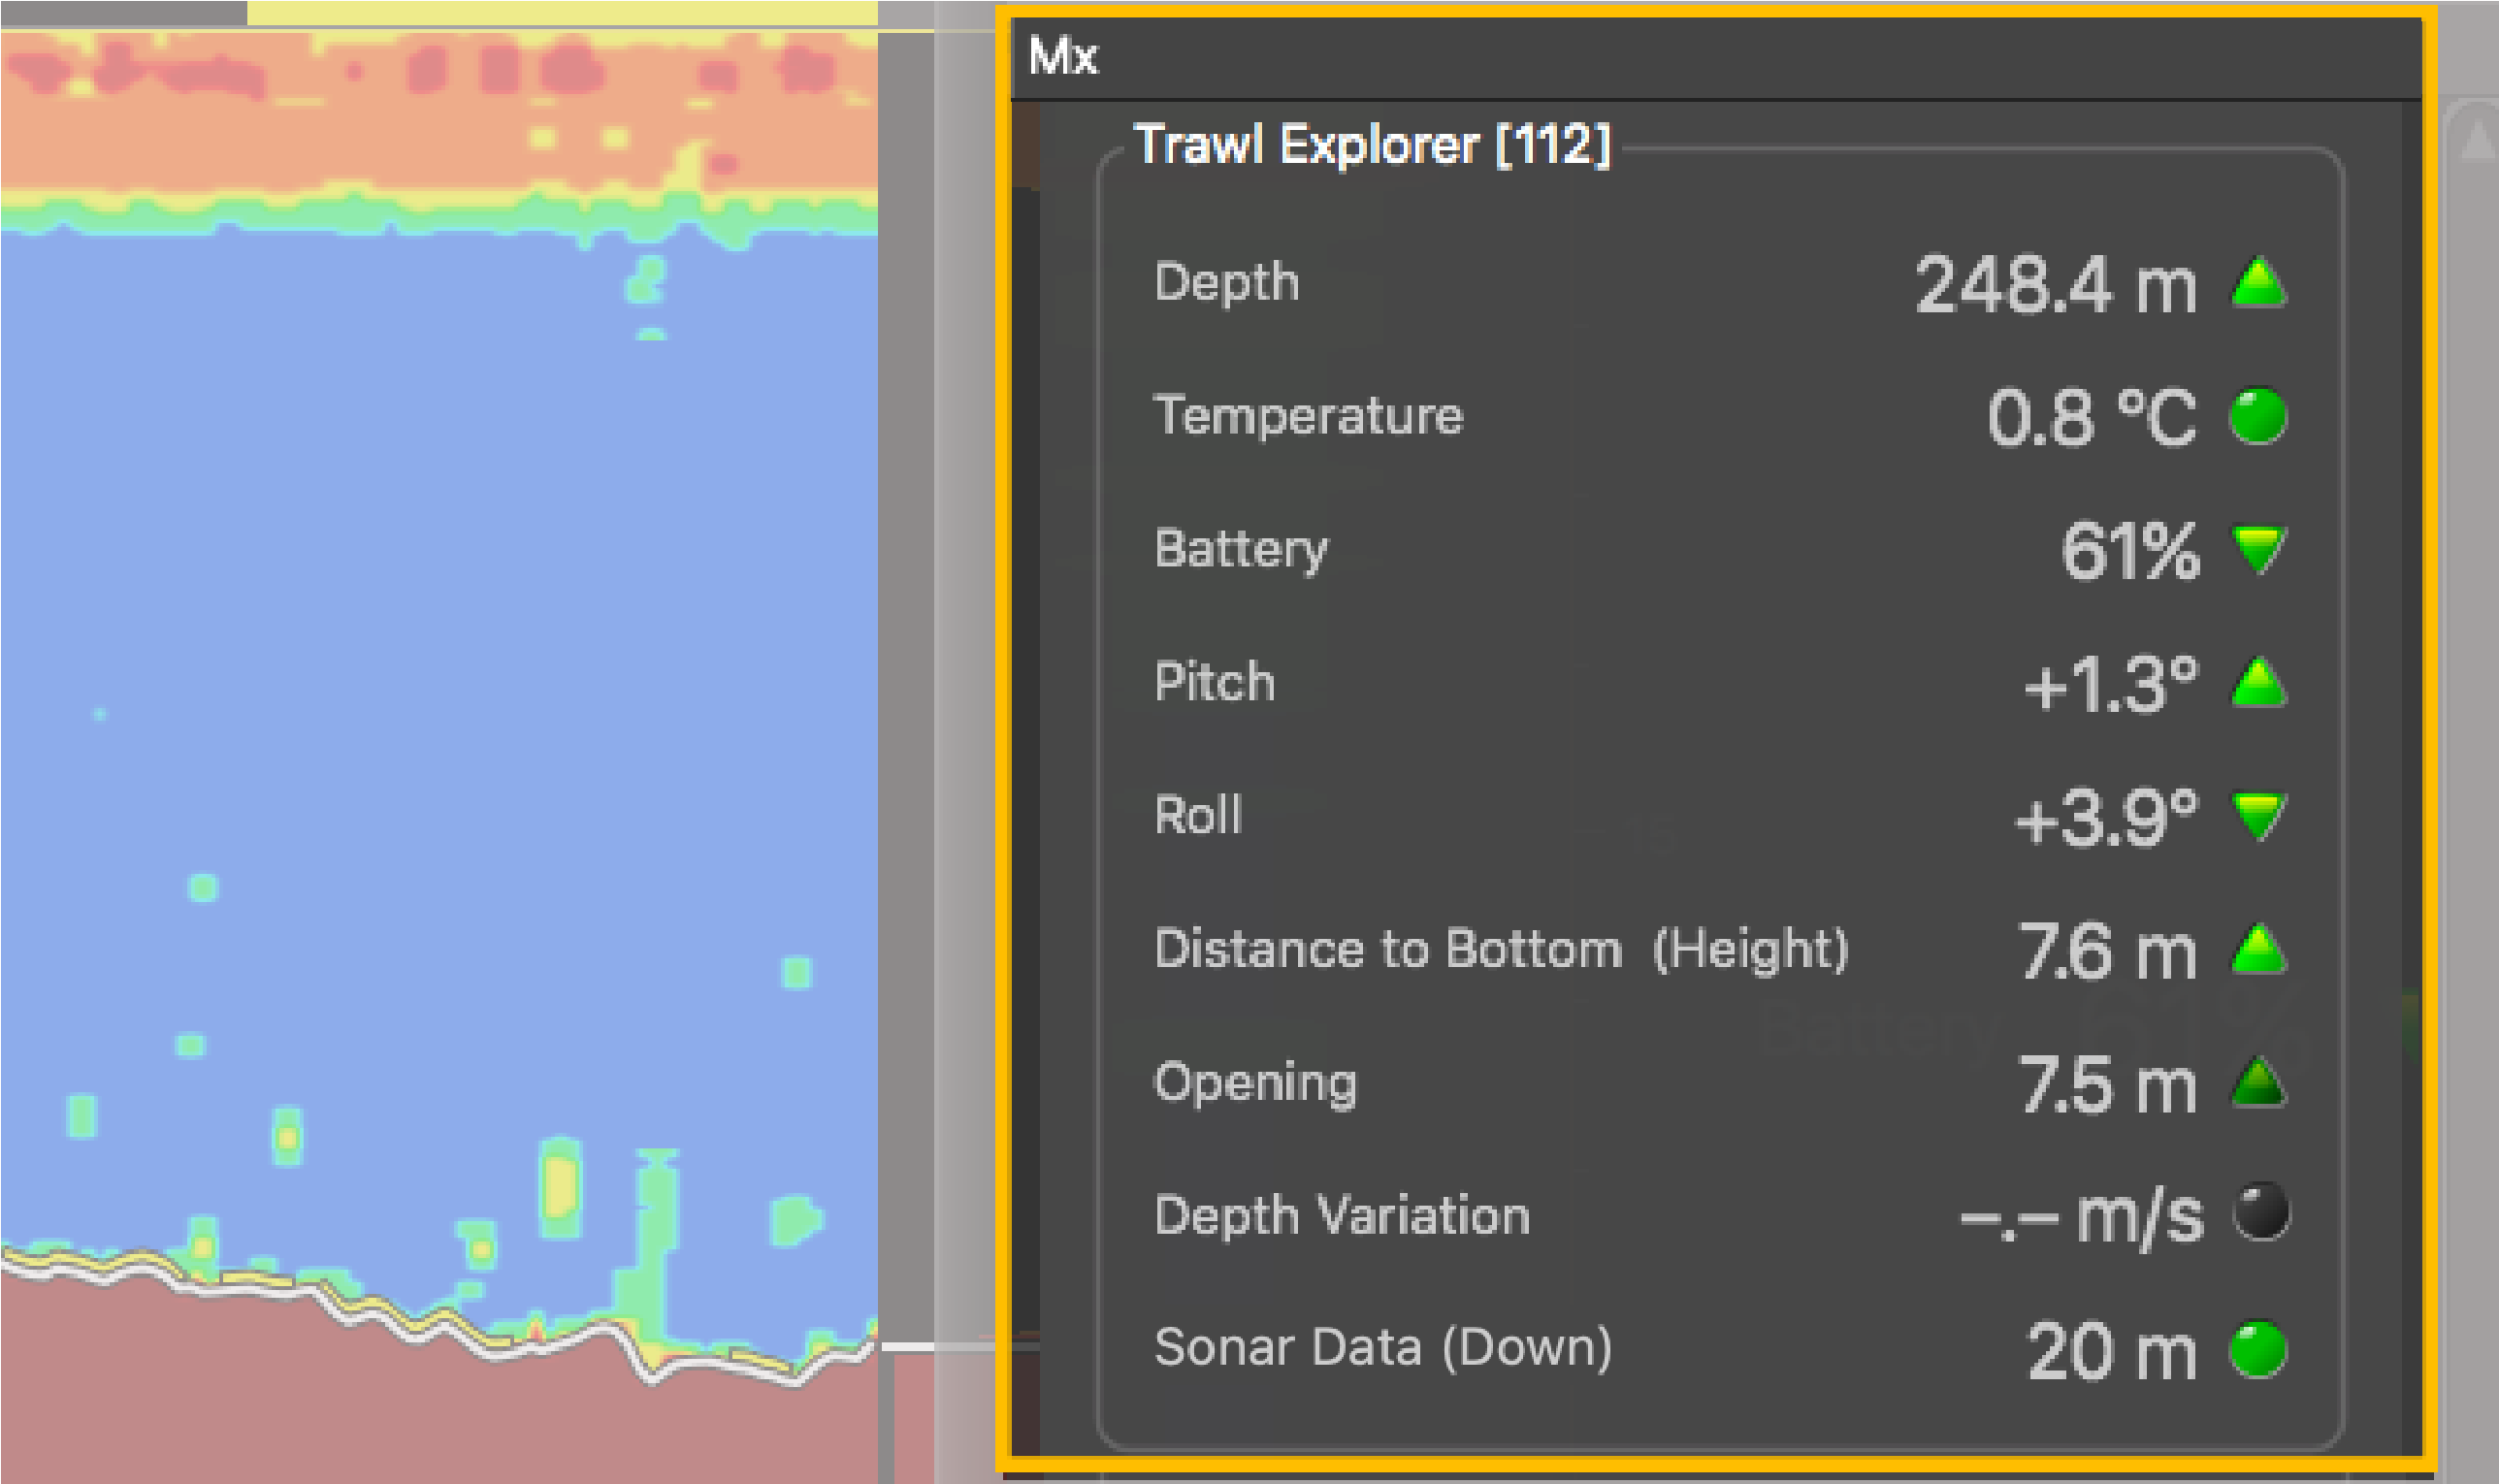
Procedure
-
From the top left corner of the screen, click
Menu
 > Customize and enter the password eureka.
-
To display the echogram view:
- Open the control panels and go to Mx.
-
In Trawl Explorer, click and hold
Sonar Data for 3 seconds
until a rectangle appears and drag it to a page.

-
Again, in Trawl Explorer, drag other data to the page
such as depth, trawl opening, pitch and roll. Each time you drop a data to the
page, you can choose its display format.
Figure 1. Example of Trawl Explorer display 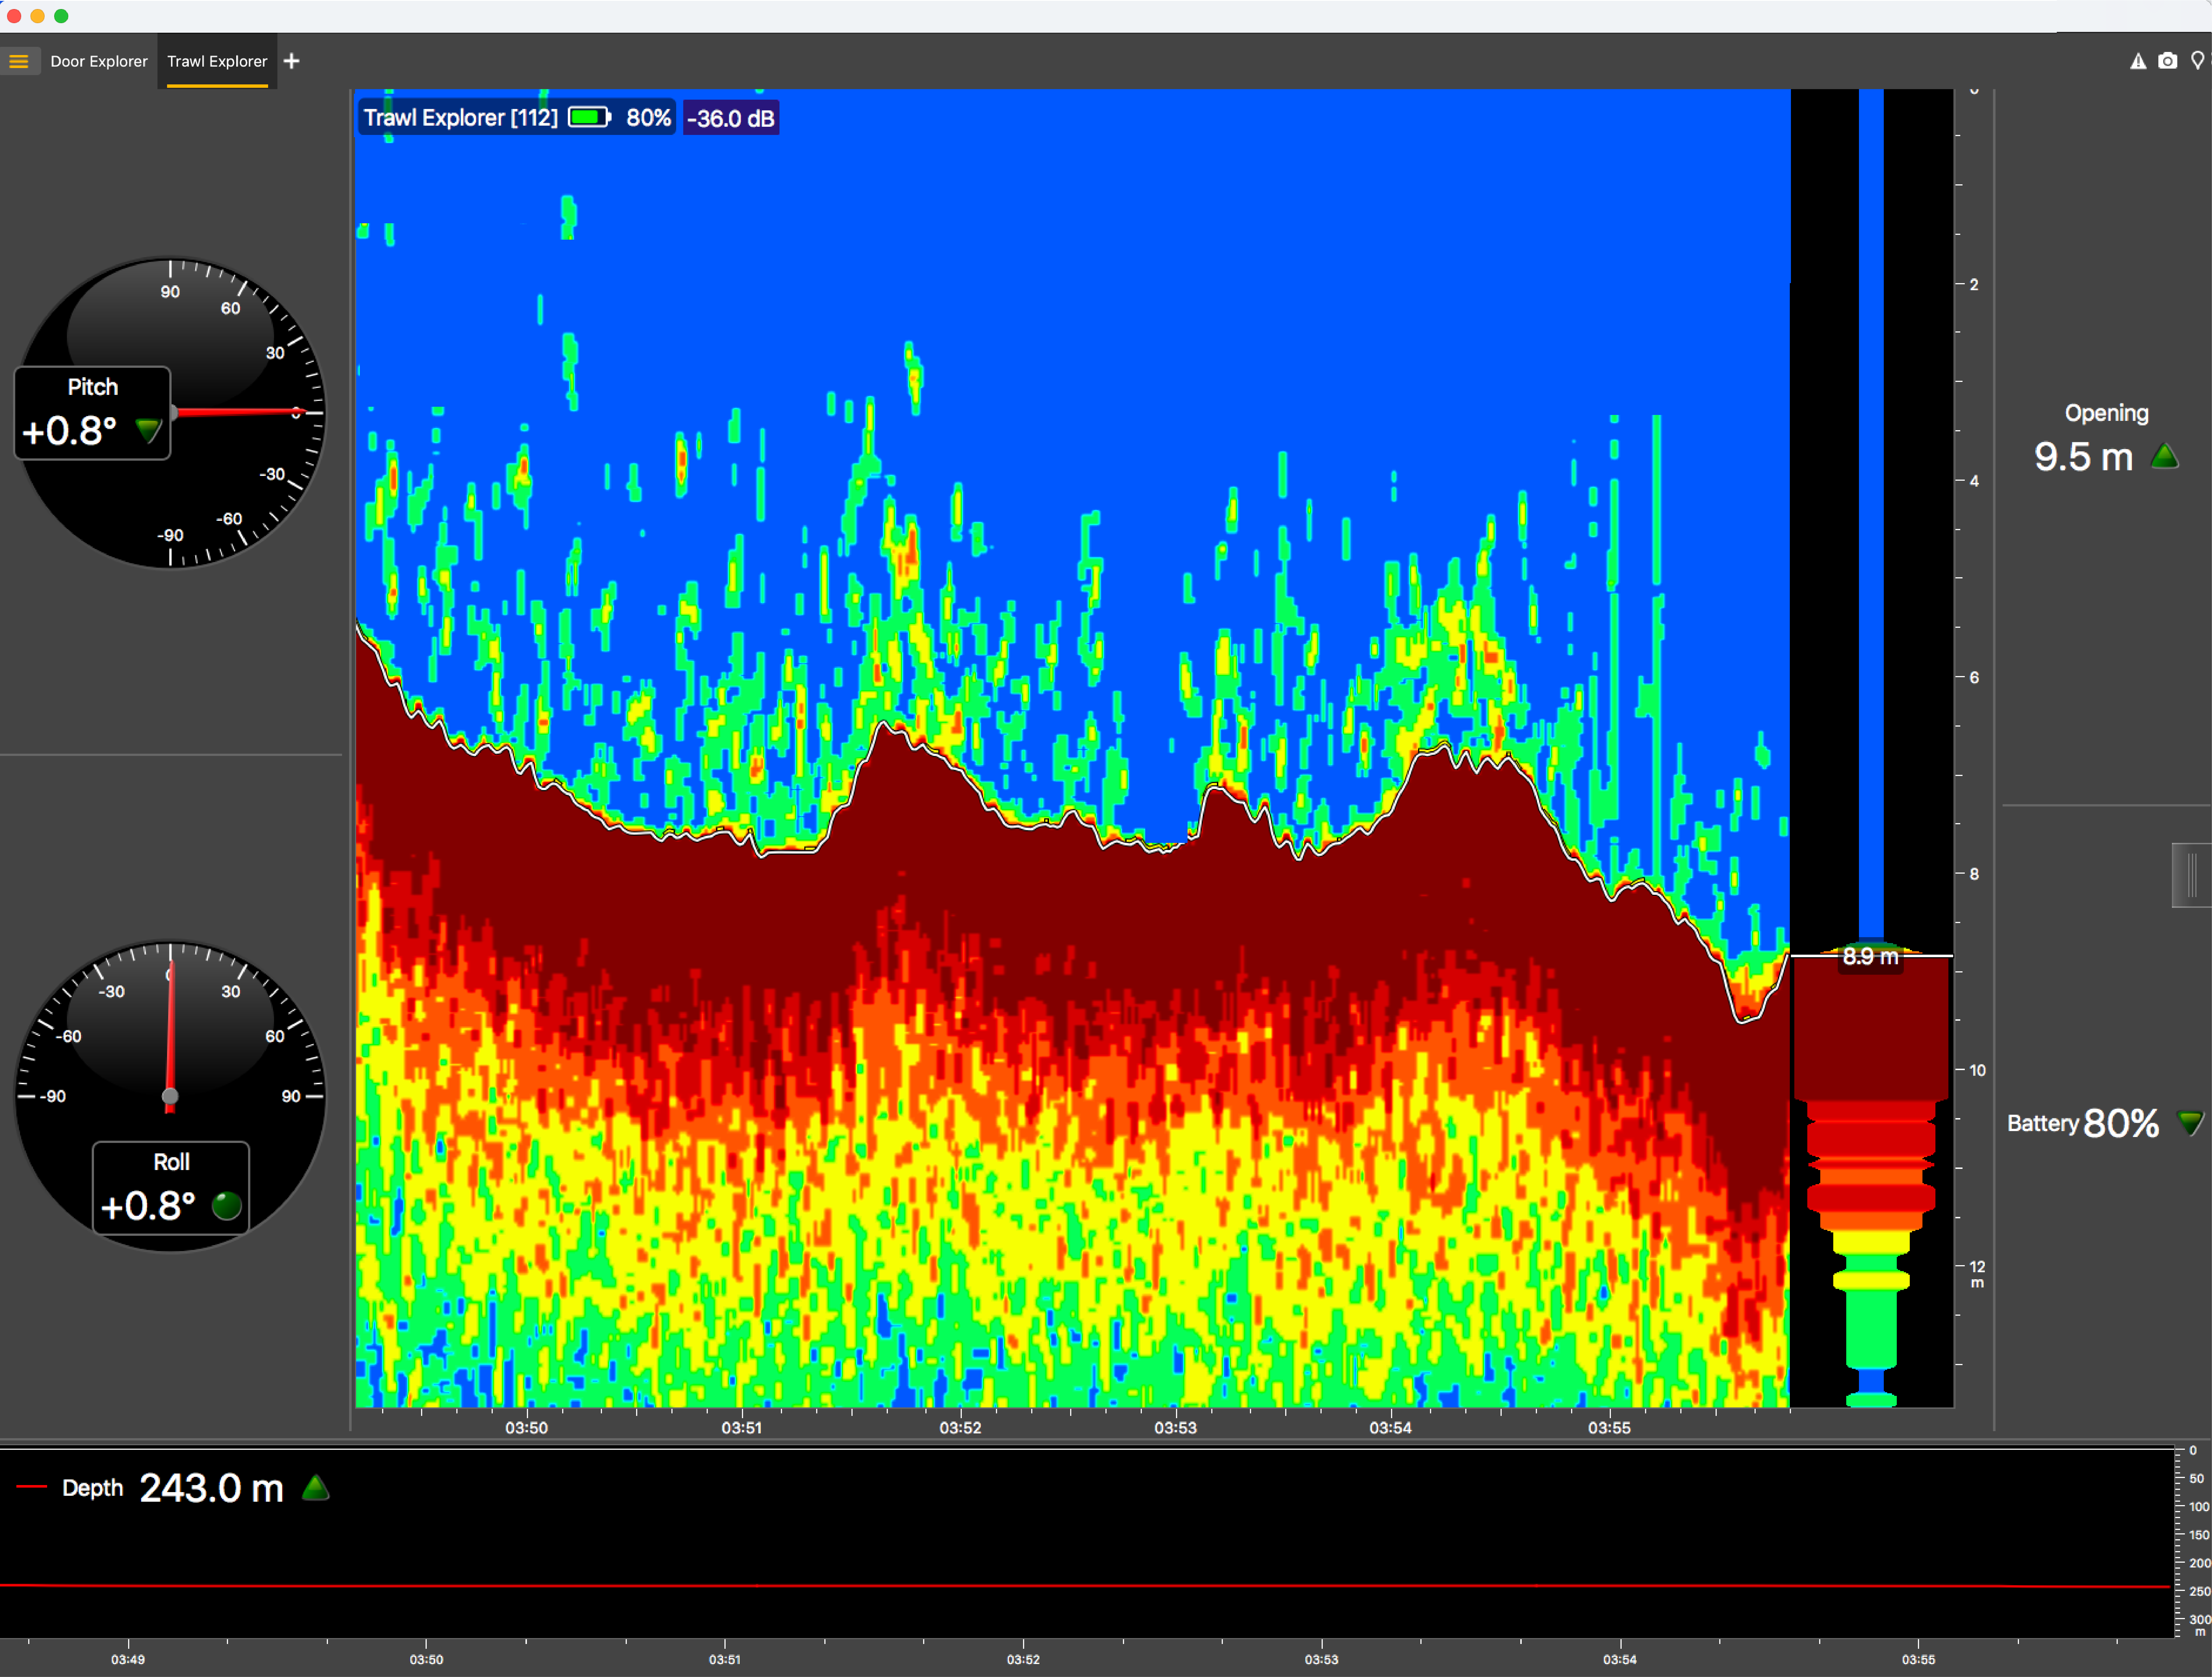
-
 If using Down only mode and if the trawl opening
configured for the sensor is under 20 meters, the sounding range automatically
changes to 20 meters if the distance to the bottom becomes lower than 20 meters
(1). This way, the echogram displays better quality images when the
distance to the bottom is shorter. Echogram images will be displayed like the
example below:
If using Down only mode and if the trawl opening
configured for the sensor is under 20 meters, the sounding range automatically
changes to 20 meters if the distance to the bottom becomes lower than 20 meters
(1). This way, the echogram displays better quality images when the
distance to the bottom is shorter. Echogram images will be displayed like the
example below: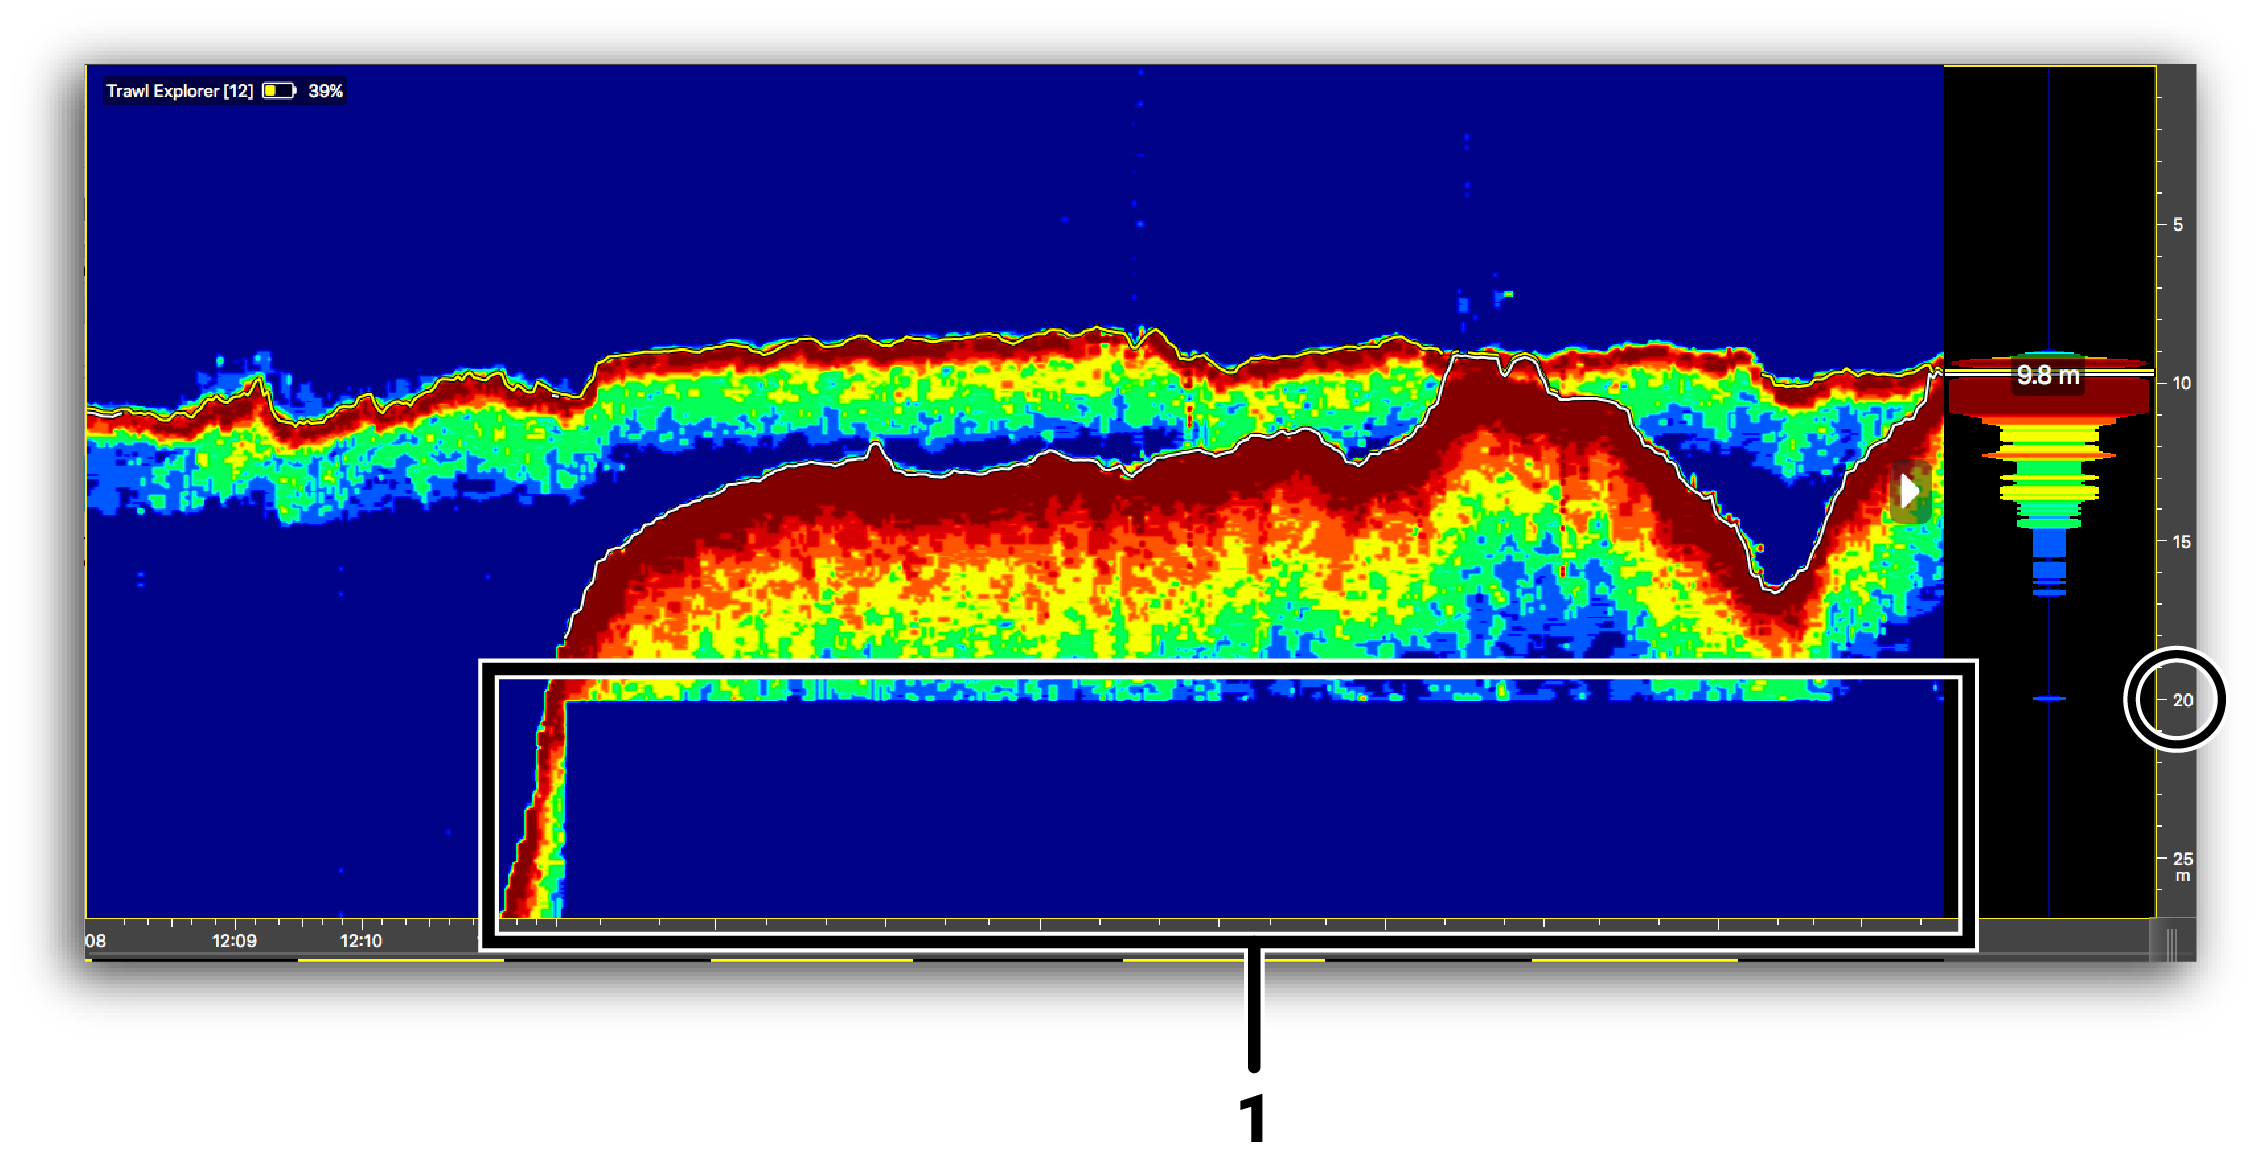
You can see that the range of the sounding adapts to the bottom detected. Basically, if the bottom is closer, the image on the echogram is shorter and of better quality, but if the bottom is farther, the image is longer and of lesser quality.
-
 Hover the mouse over the echogram to display the target
strength of the detected targets. The higher is the target strength, the
bigger the target is.
Hover the mouse over the echogram to display the target
strength of the detected targets. The higher is the target strength, the
bigger the target is.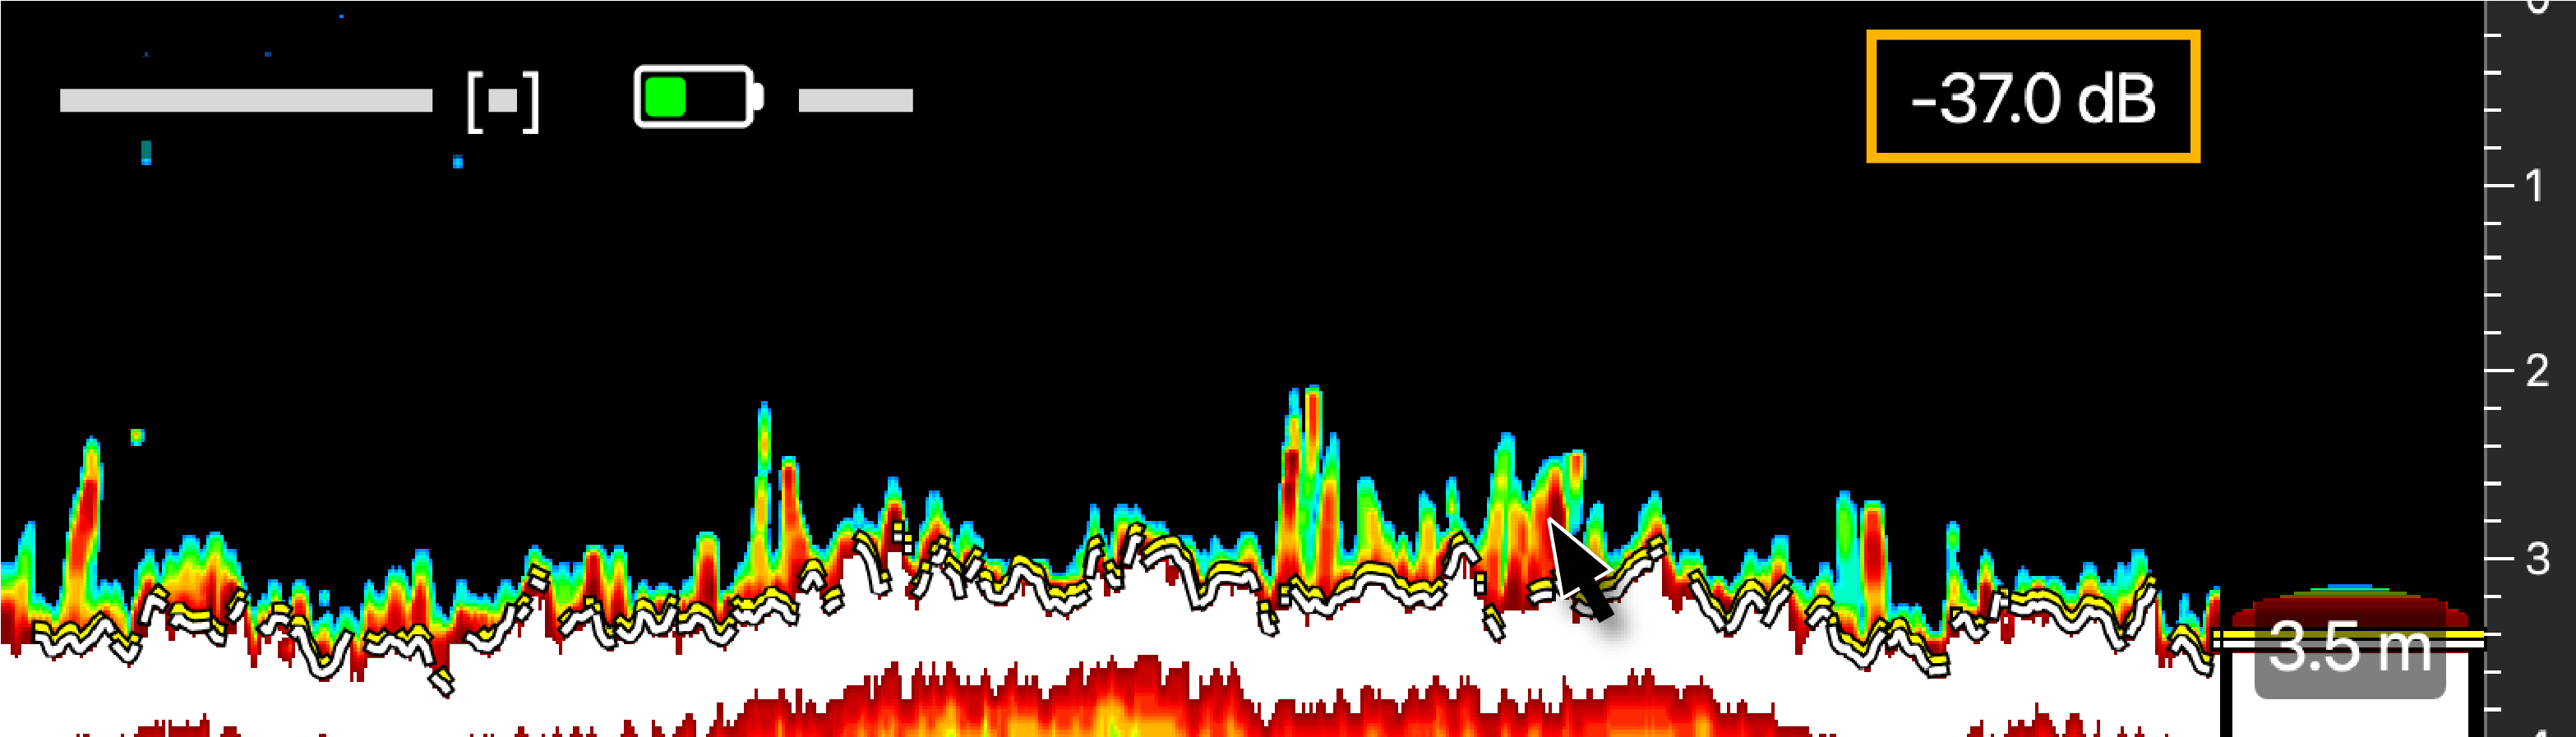
-
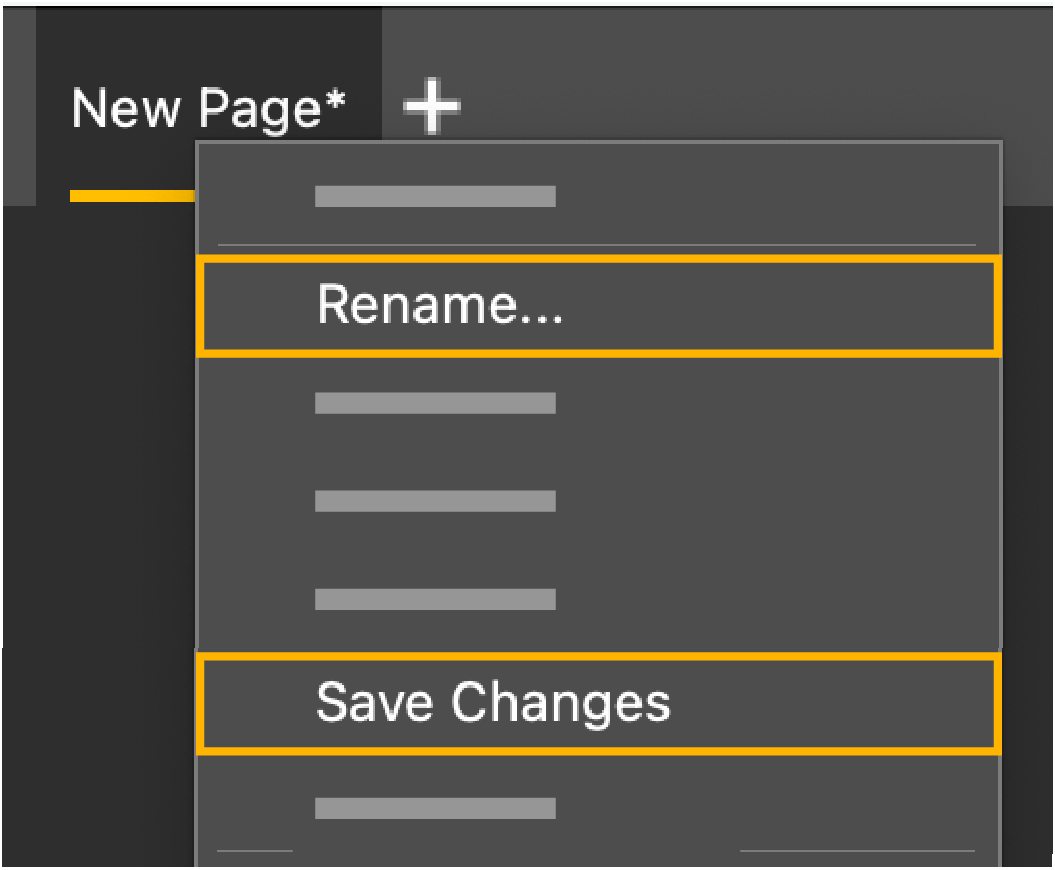
To save the changes you made:
- To rename the page, right-click the name of the page and click Rename.
-
To save the page, right-click the name of the page and click Save Changes.
-
Deactivate the Customize mode when you have finished
customizing pages: click Menu > Customize again.