Configuring Sensor Settings
Important: Make sure the settings you enter here are the same
as in Mosa2.
Spread Sensors
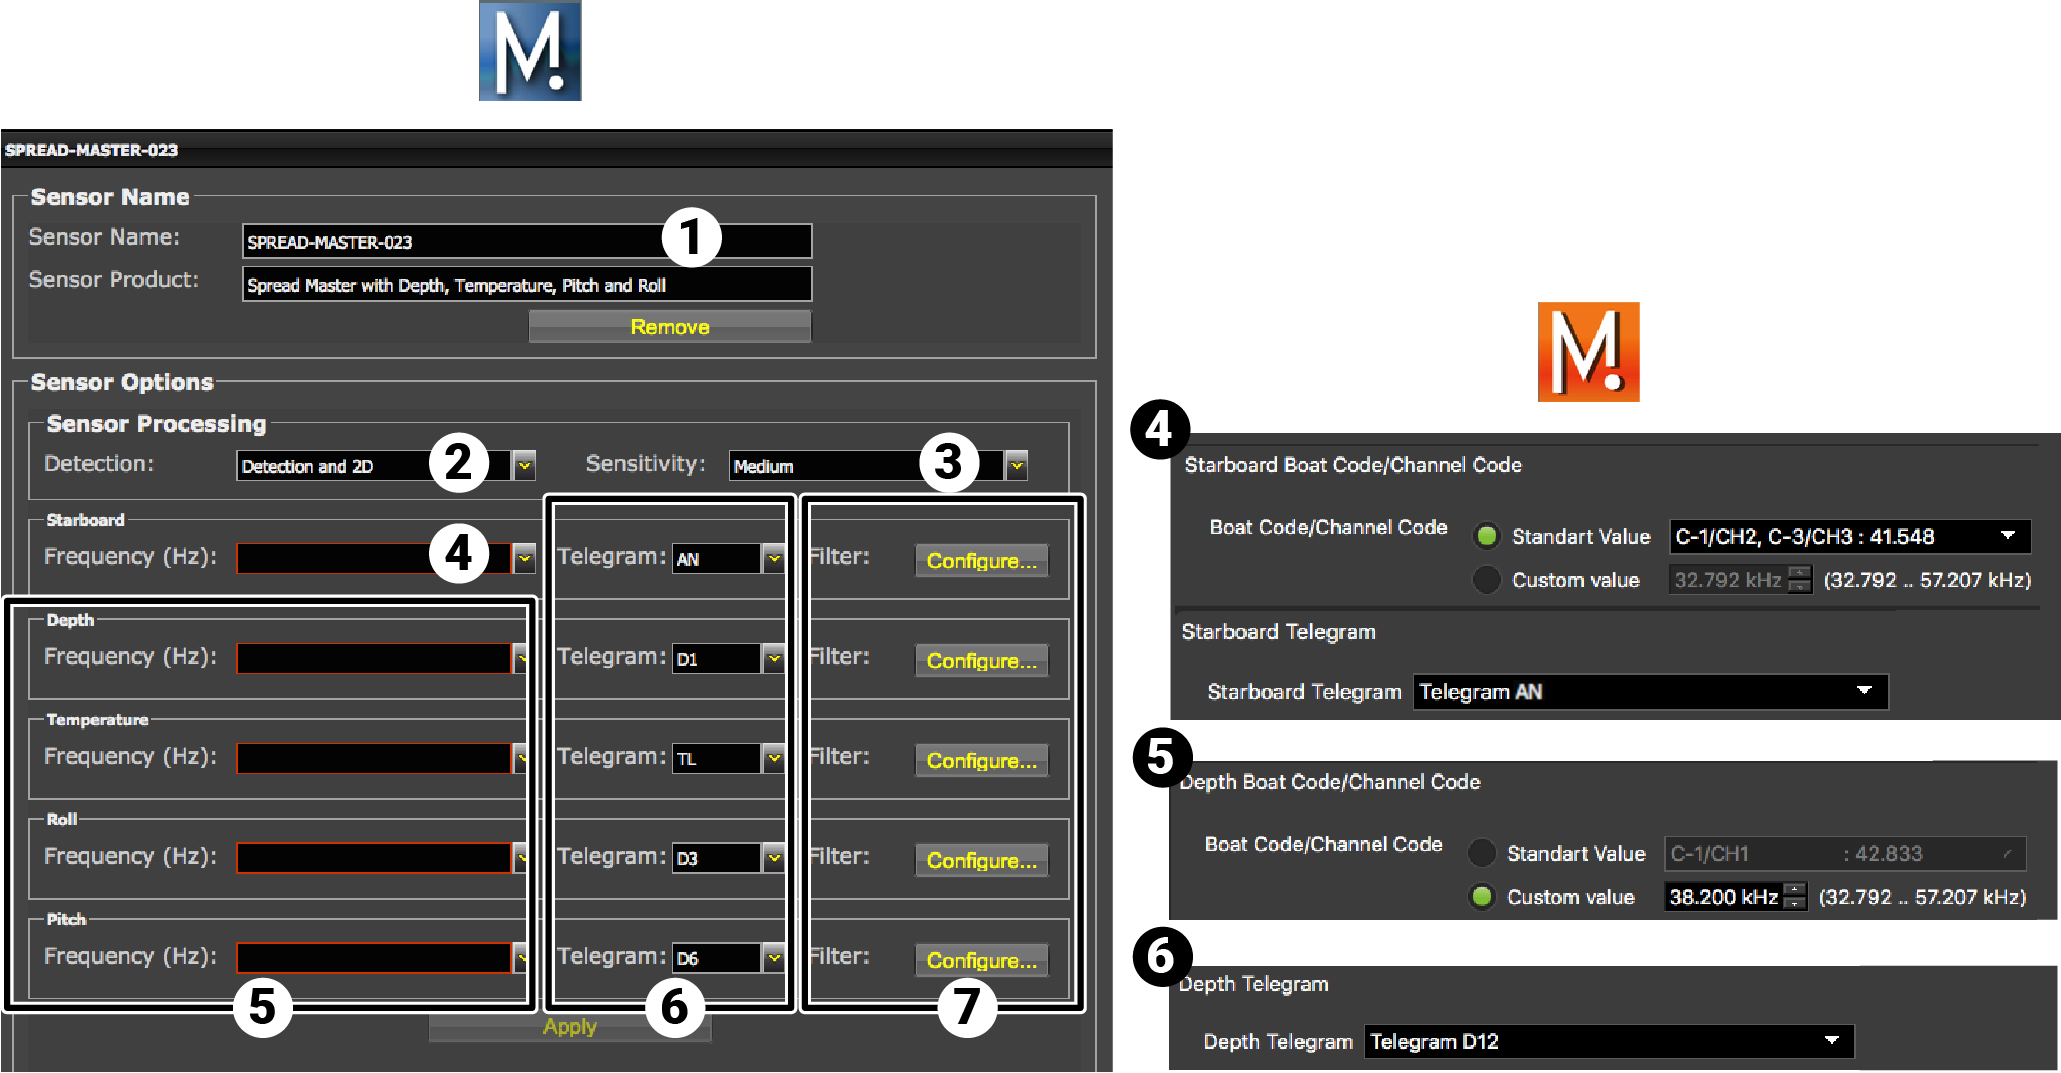
| 1 | Sensor name displayed in Scala2 and its features. |
| 2 | This setting helps detecting the signal of the sensor among other sensor or echosounder
signals. Change only if you have issues receiving data.
|
| 3 |
|
| 4 | Master and clump sensors only: enter the same frequencies as those entered in Mosa2 in Clump and Starboard Boat Code/Channel Codes. |
| 5 | For each option, enter the same frequencies as those entered in Mosa2 in Boat Code/Channel Codes. |
| 6 | For each option, enter the same telegrams as those entered in Mosa2. |
| 7 | Click Configure to change filters applied on incoming data. |
Click Apply when you have finished.
Marport PI compatible Spread Sensors
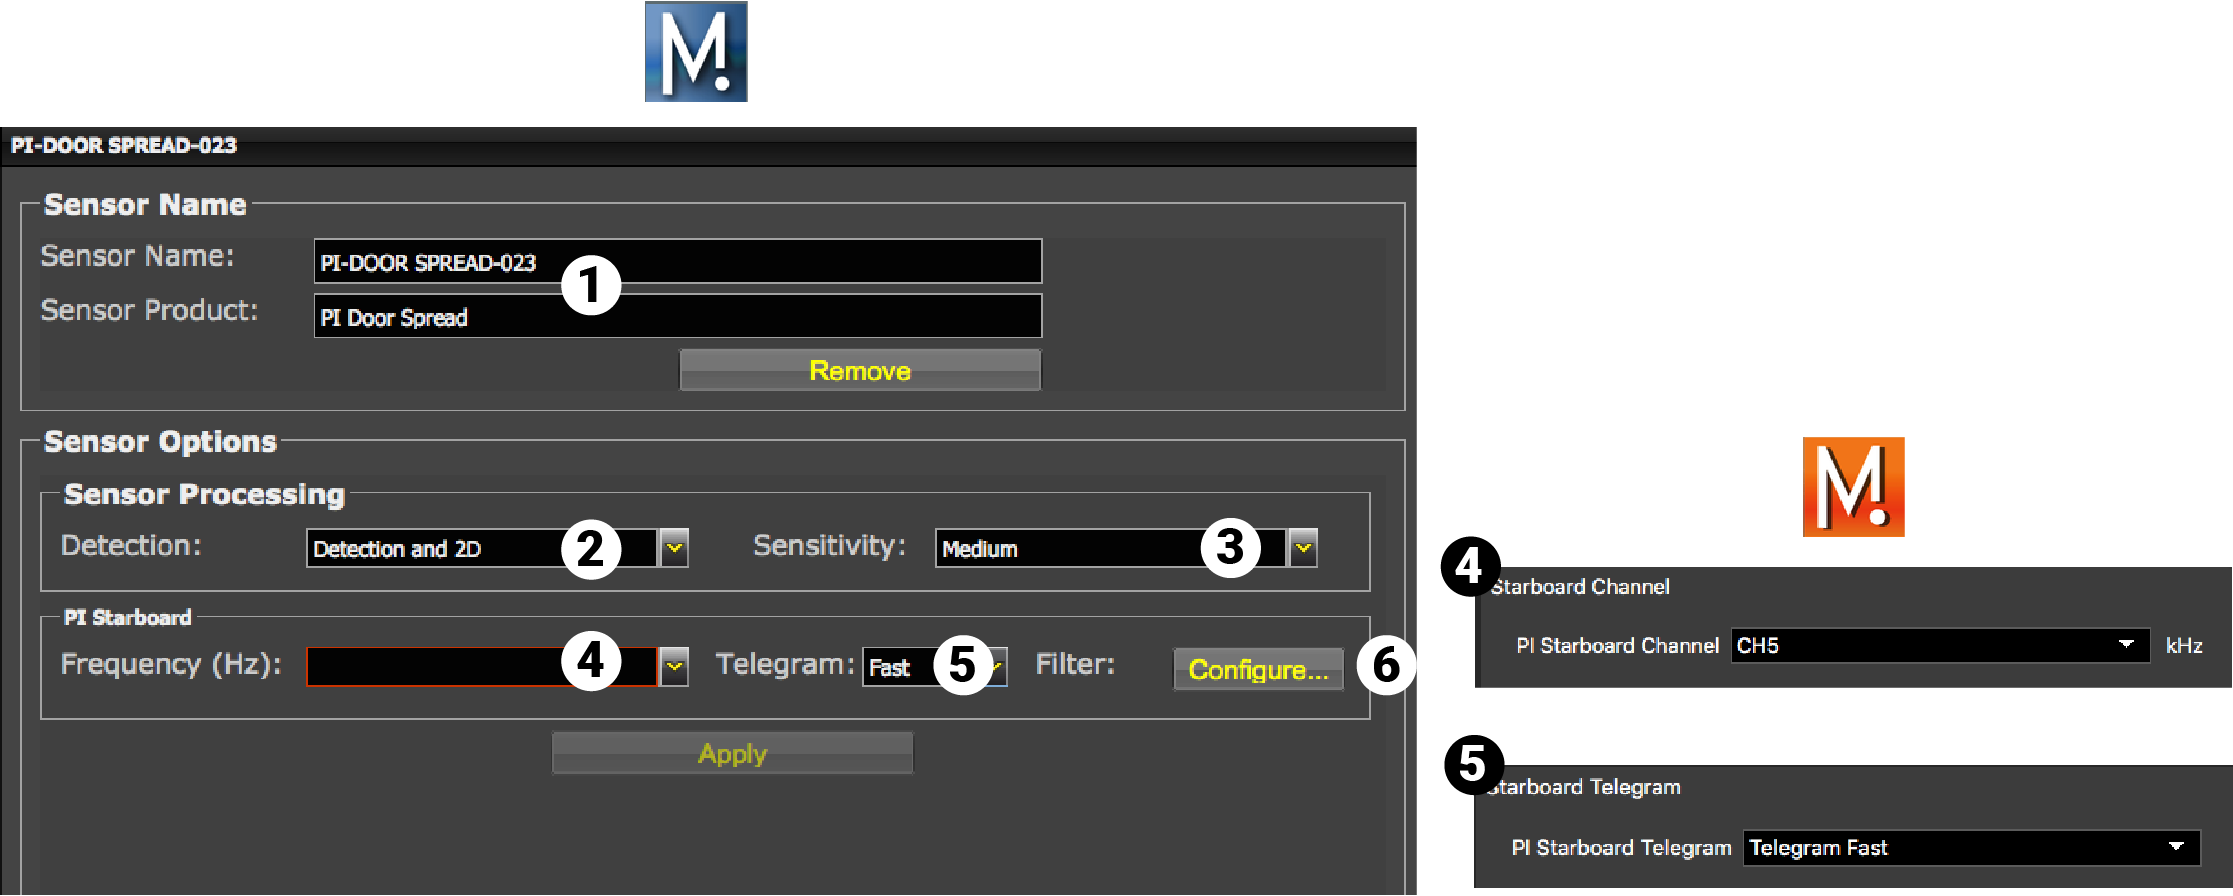
| 1 | Sensor name displayed in Scala2 and its features. |
| 2 | This setting helps detecting the signal of the sensor among other sensor or echosounder
signals. Change only if you have issues receiving data.
|
| 3 |
|
| 4 | Enter the same frequency as the one entered in Mosa2 in PI Starboard Channel or PI Clump Channel, if applicable (exact frequency is visible from the Information page). |
| 5 | Enter the interval at which signals are sent. They must be the same as in Mosa2. |
| 6 | Click Configure to change filters applied on incoming data. |
Door Sounder Sensor

| 1 | Sensor name displayed in Scala2 and its features. |
| 2 | This setting helps detecting the signal of the sensor among other sensor or echosounder
signals. Change default setting only if you have issues receiving data.
|
| 3 | This setting also helps detecting the sensor signal. Leave default setting at Synchro 1. |
| 4 | Enter the same frequency as the one entered for the uplink frequency in Mosa2. |
| 5 | Range of the down sounding (do not select the other soundings). Corresponds to Sounding Range in Mosa2. |
| 6 |
Click Configure to change filters
applied on incoming data. Filters are particularly useful to reduce interferences on the
echogram data.
Tip: Please refer to Scala2 user
guide for more information about the filters.
|
Door Sounder with target strength calibration
Note: Door Sounder with target strength calibration is named Bottom Explorer in Scala2.
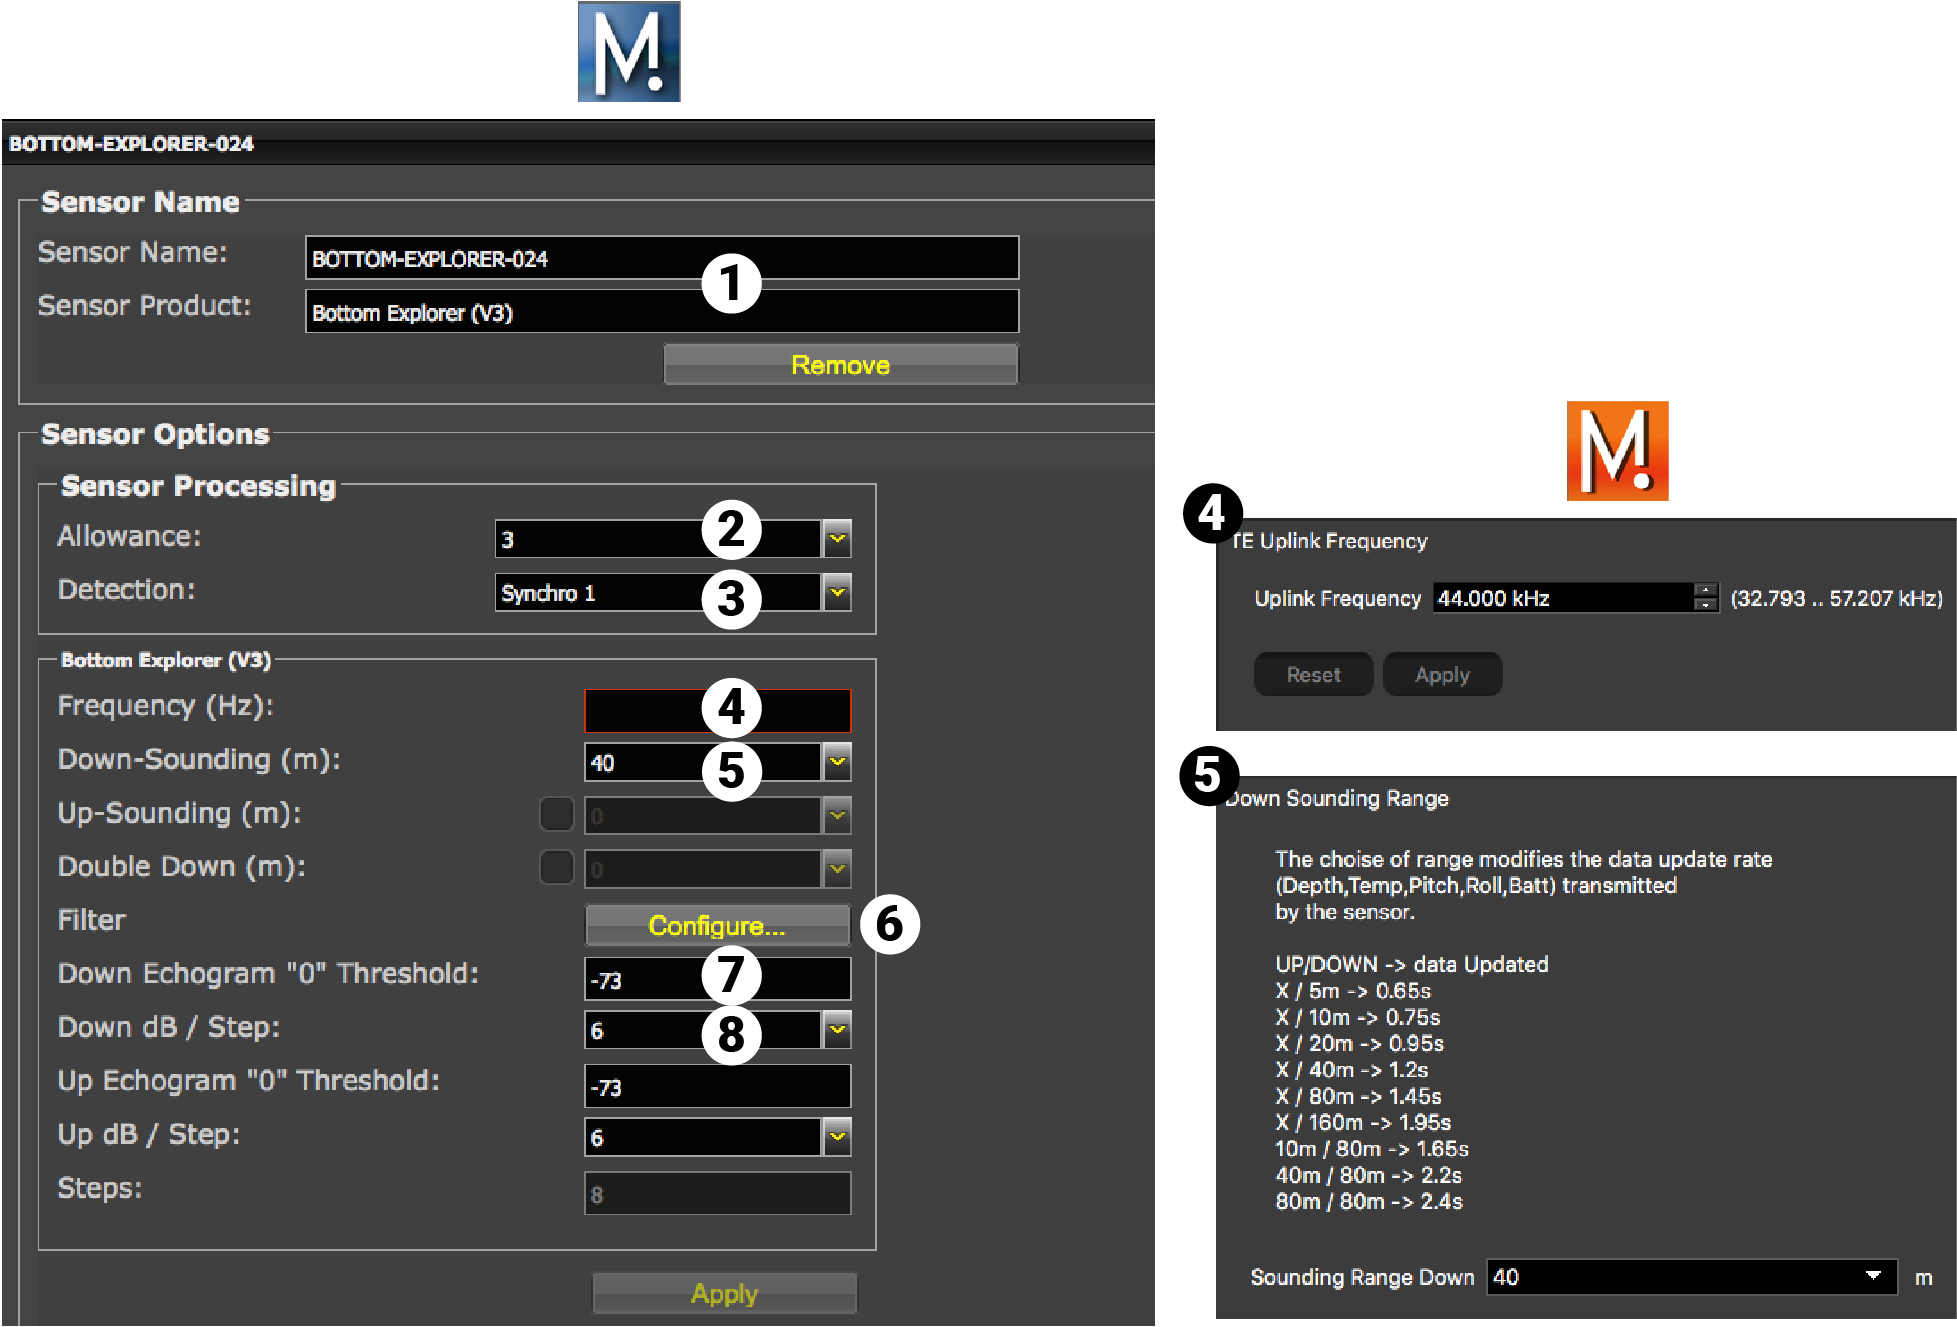
| 1 | Sensor name displayed in Scala2 and its features. |
| 2 | This setting helps detecting the signal of the sensor among other sensor or echosounder
signals. Change default setting only if you have issues receiving data.
|
| 3 | This setting also helps detecting the sensor signal. Leave default setting at Synchro 1. |
| 4 | Enter the same frequency as the one entered for the uplink frequency in Mosa2. |
| 5 | Range of the down sounding. Select and complete Double Down if using Down 1 + Down 2 sounding mode. |
| 6 |
Click Configure to change filters applied on incoming data.
Tip: Please refer to Scala2 user
guide for more information about the filters.
|
| 7 | Do not change this setting. |
| 8 | Do not change this setting. |
Results
The sensor is added to the system. You should see incoming data from the control panels, in Sensors Data. You can now configure the display of incoming data in Scala2.