
Connecting the Sensor to Mosa2
To configure the sensor, you need to connect it to Mosa2 application, using either the Dock or the Configuration Cable.
Using a Dock Charger Plug
About this task
Tip: Refer to Dock user manual to have more details
about the use of this product.
Procedure
-
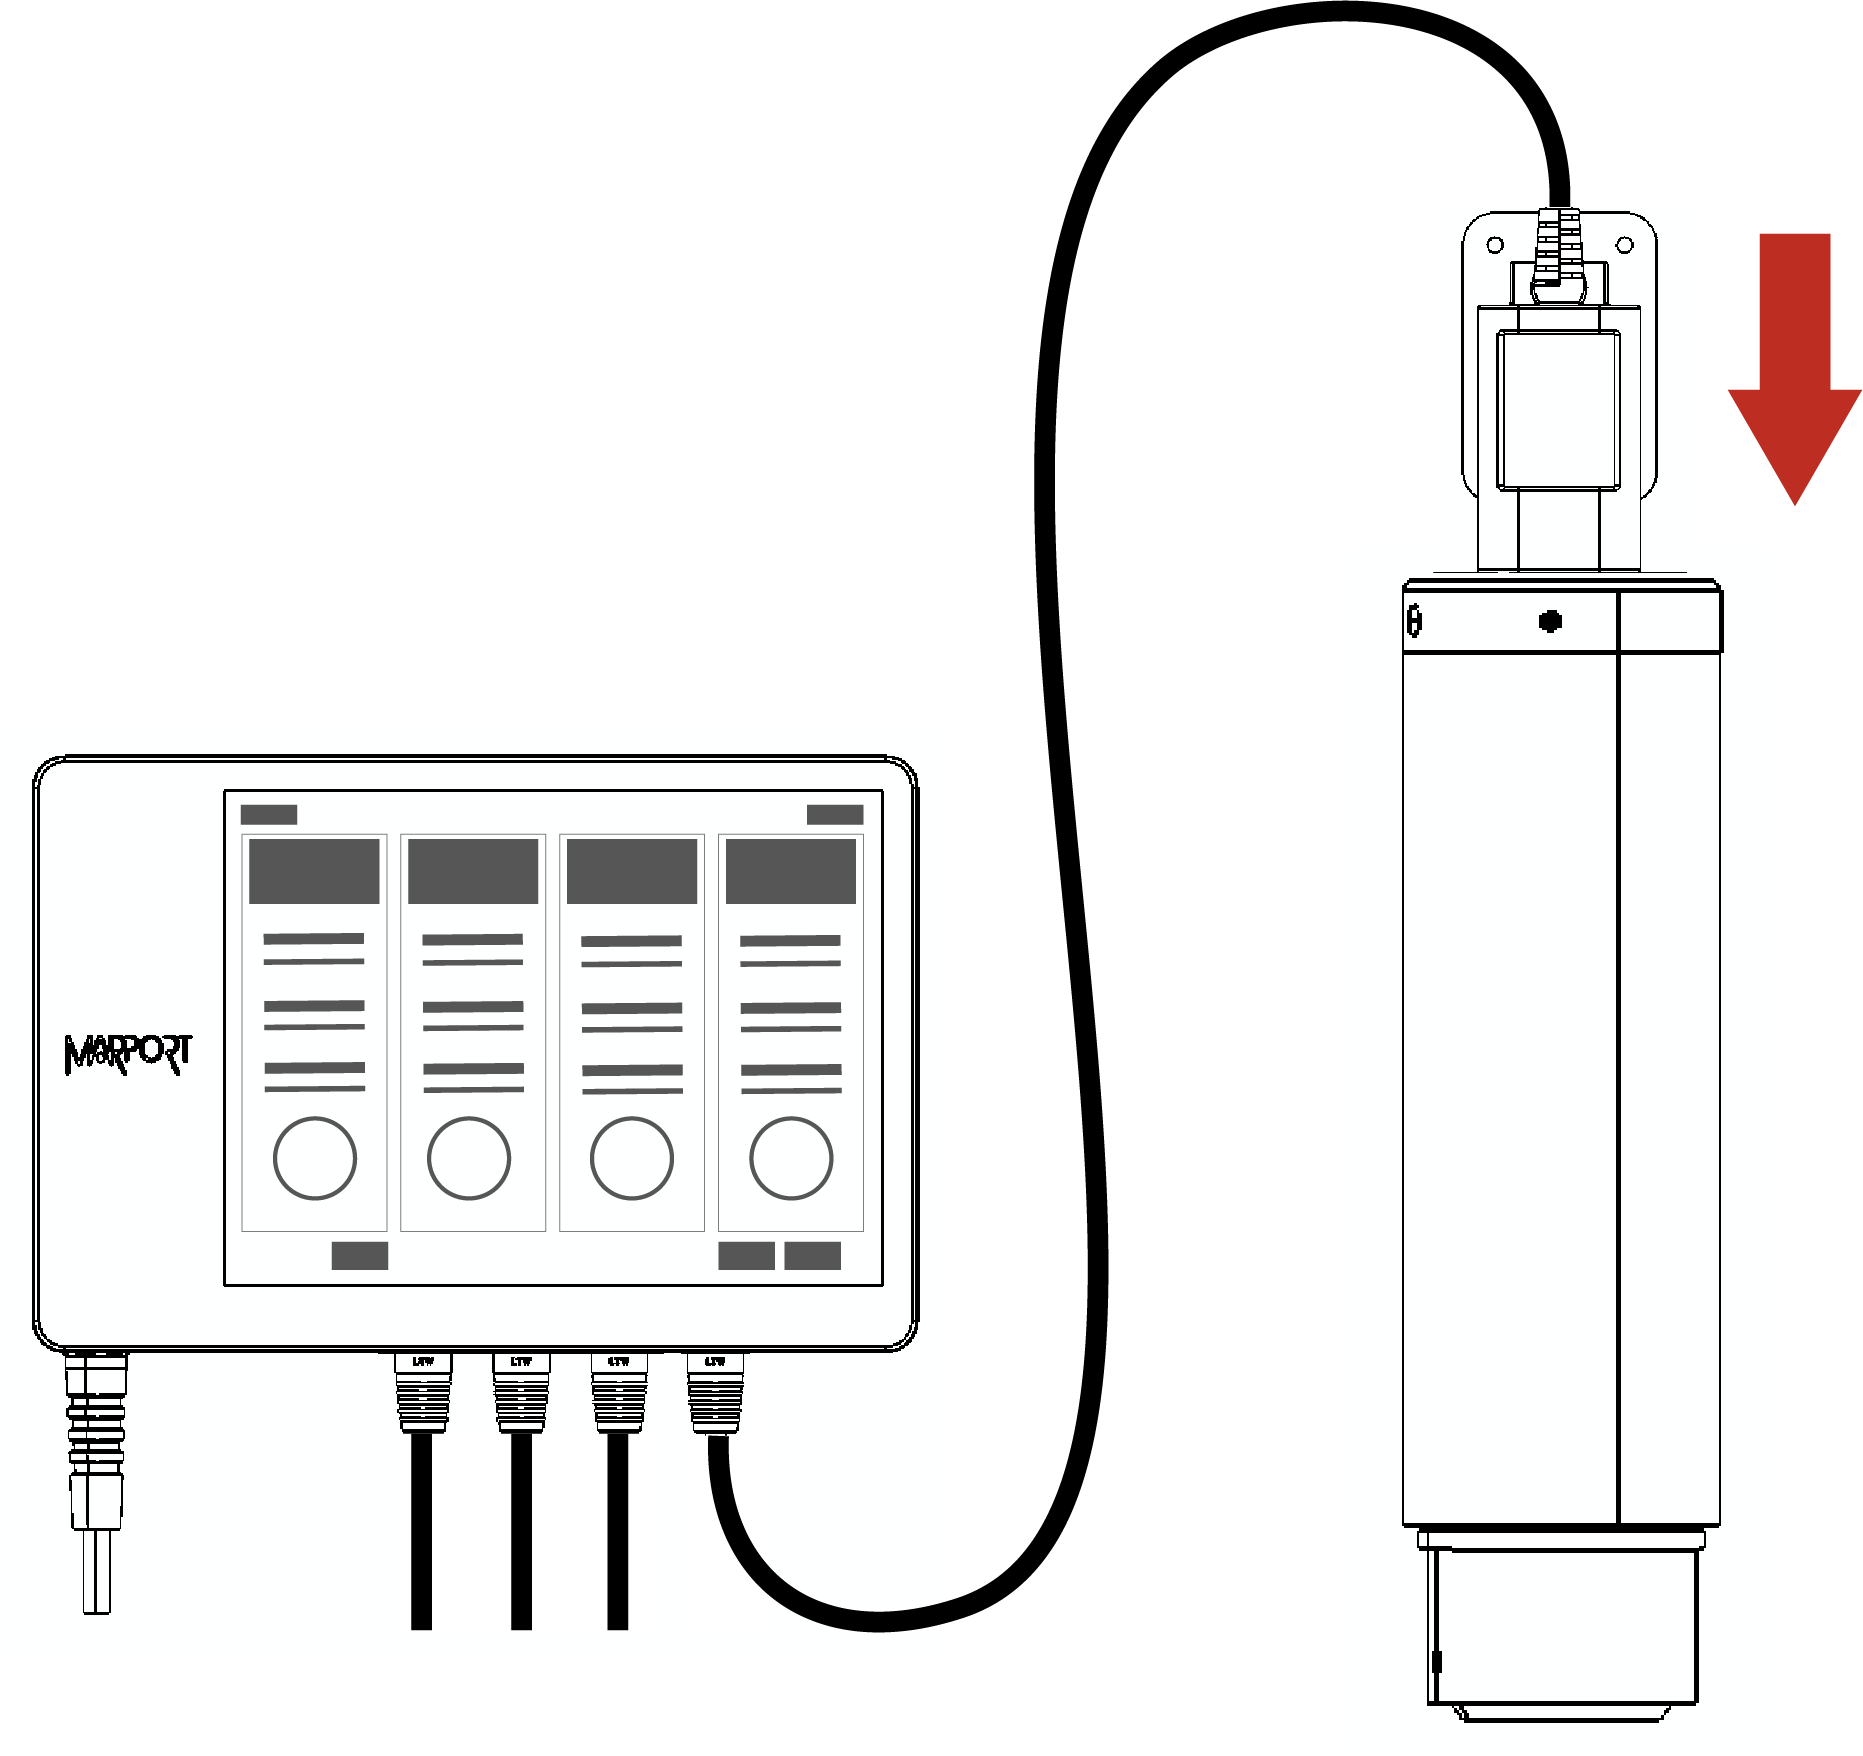
Connect one Dock charging plug to the
sensor's endcap.
-
Mosa2 discovery page opens. The
sensor is displayed.
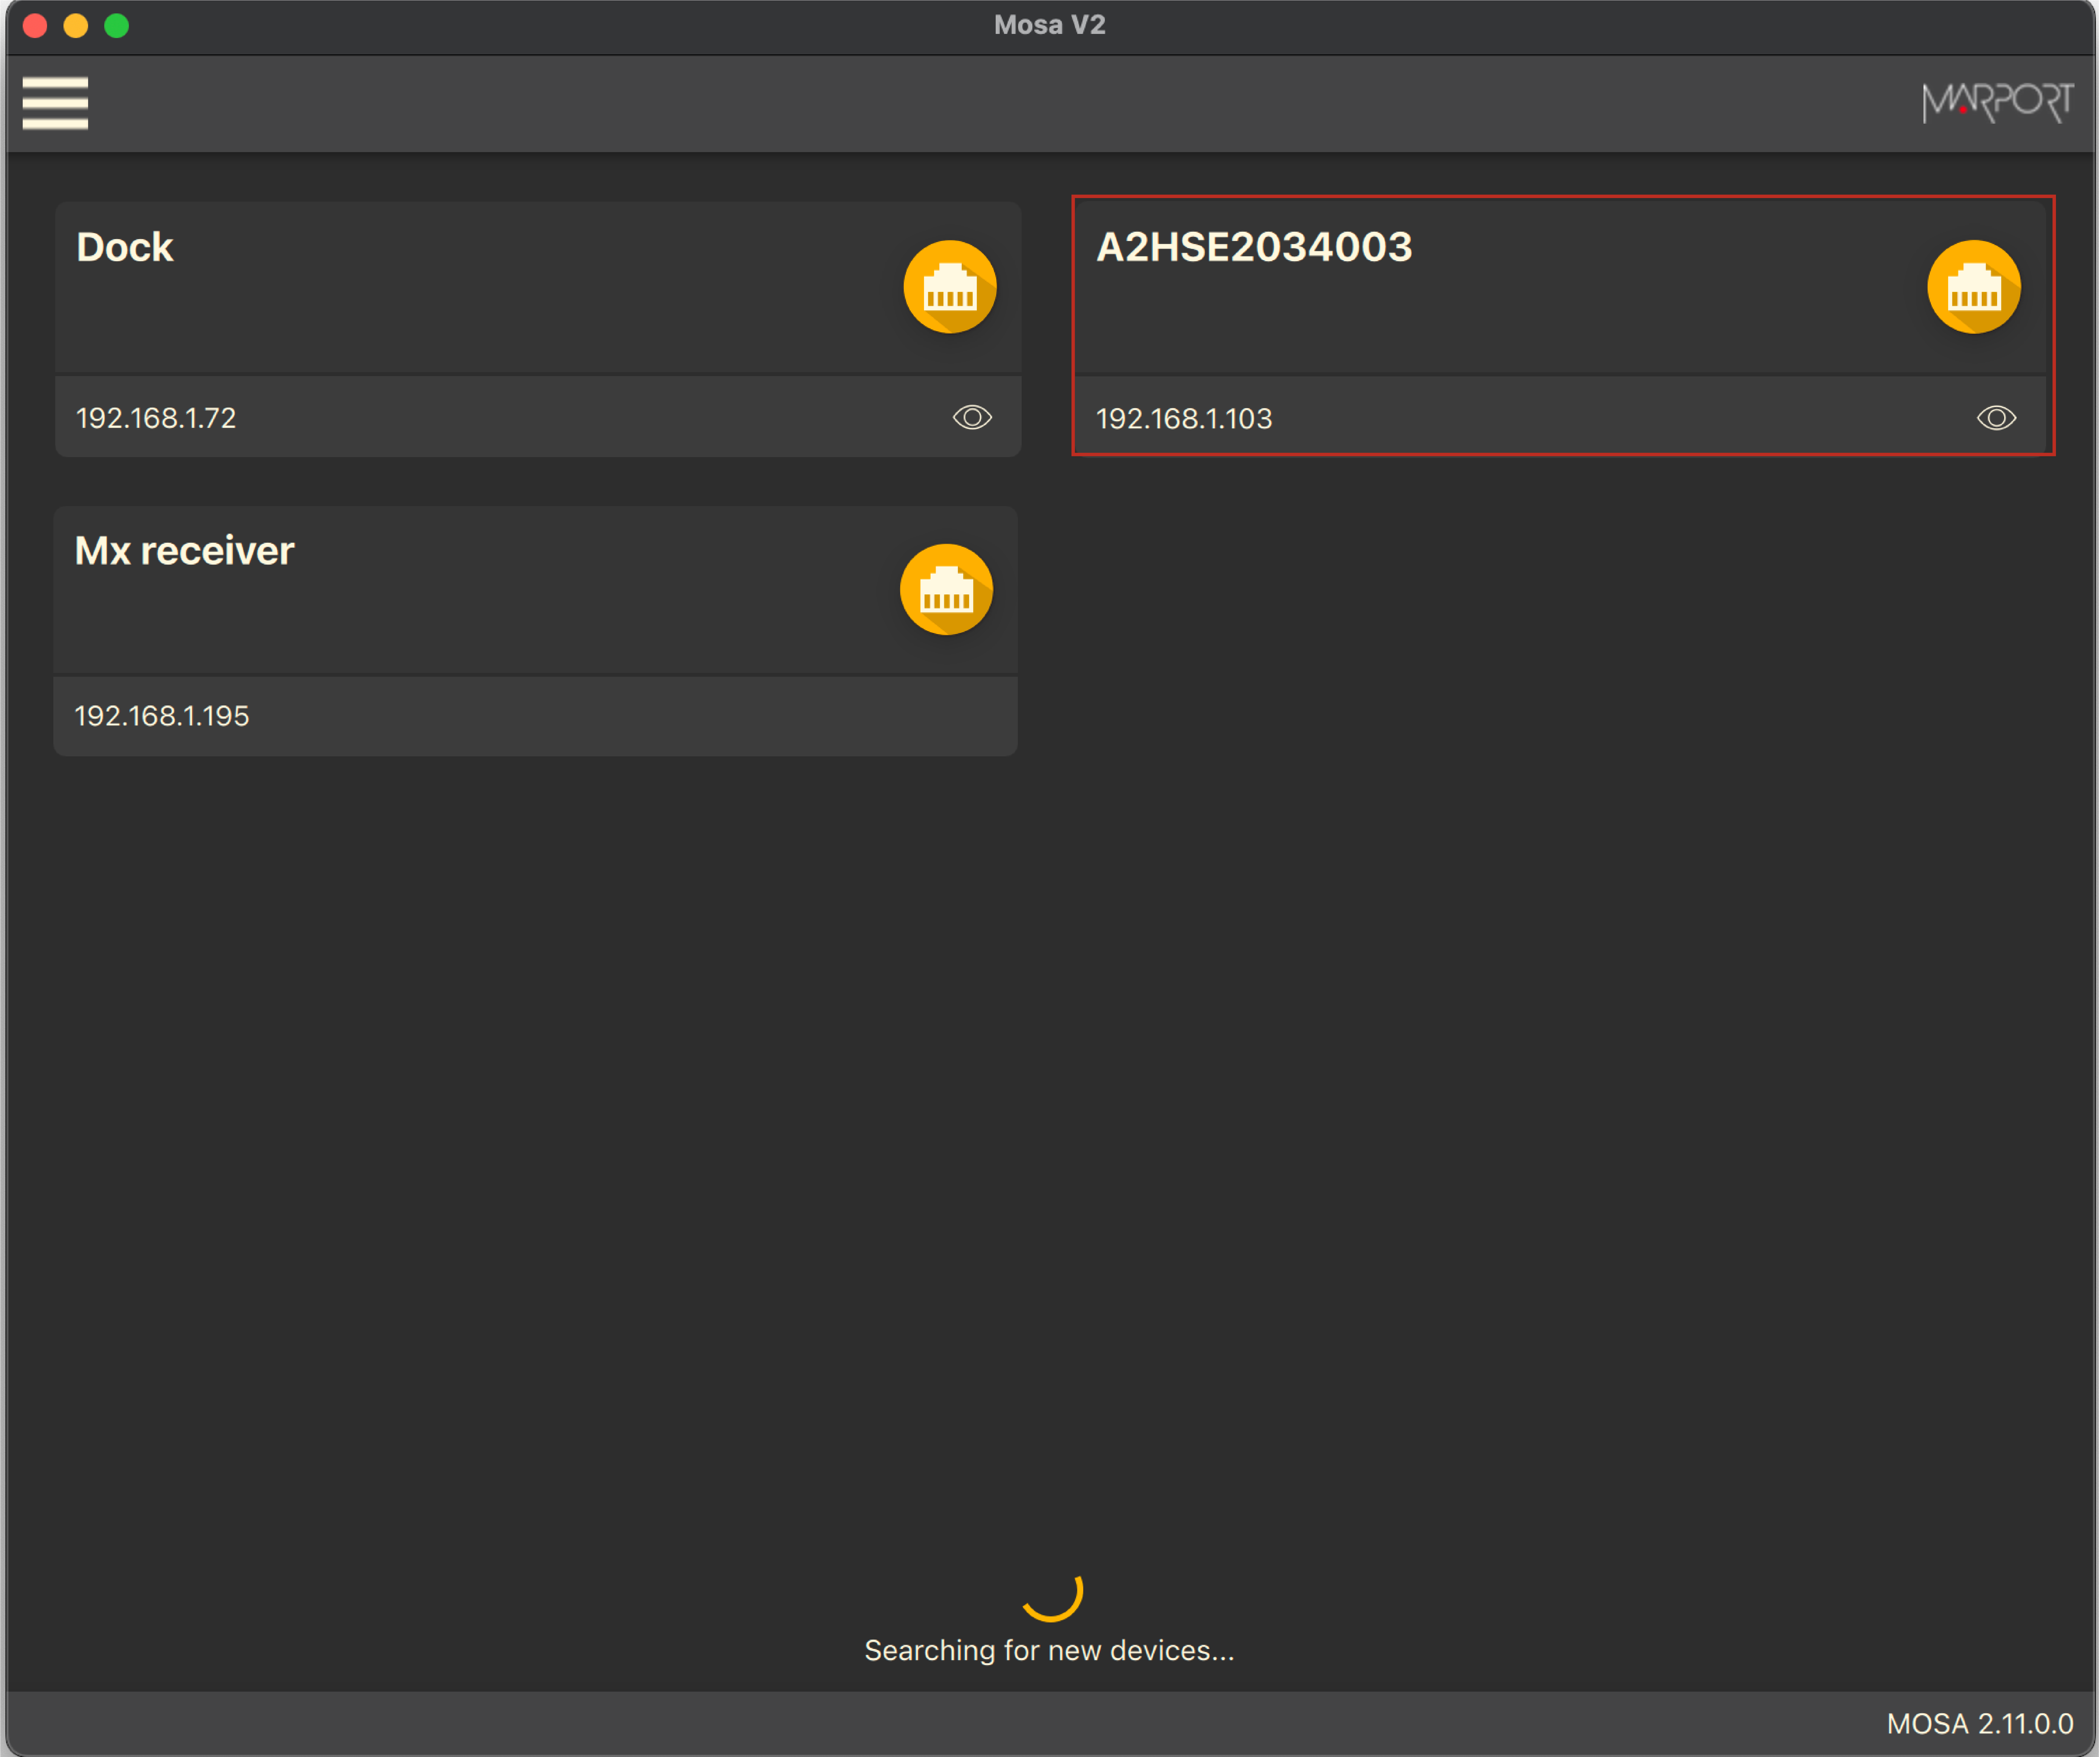
- Click
 to open the
sensor configuration page.
to open the
sensor configuration page. - Click
 to show the
deploy animation on the charger plug for 30
seconds.
to show the
deploy animation on the charger plug for 30
seconds.
- Click
Using the Configuration Cable
Connect the Configuration Cable from the computer to the sensor to display the sensor configuration page on Mosa2.
About this task
Tip: Refer to the Configuration Cable Quick Reference Guide available on our
website for more details about the use of this product.
Procedure
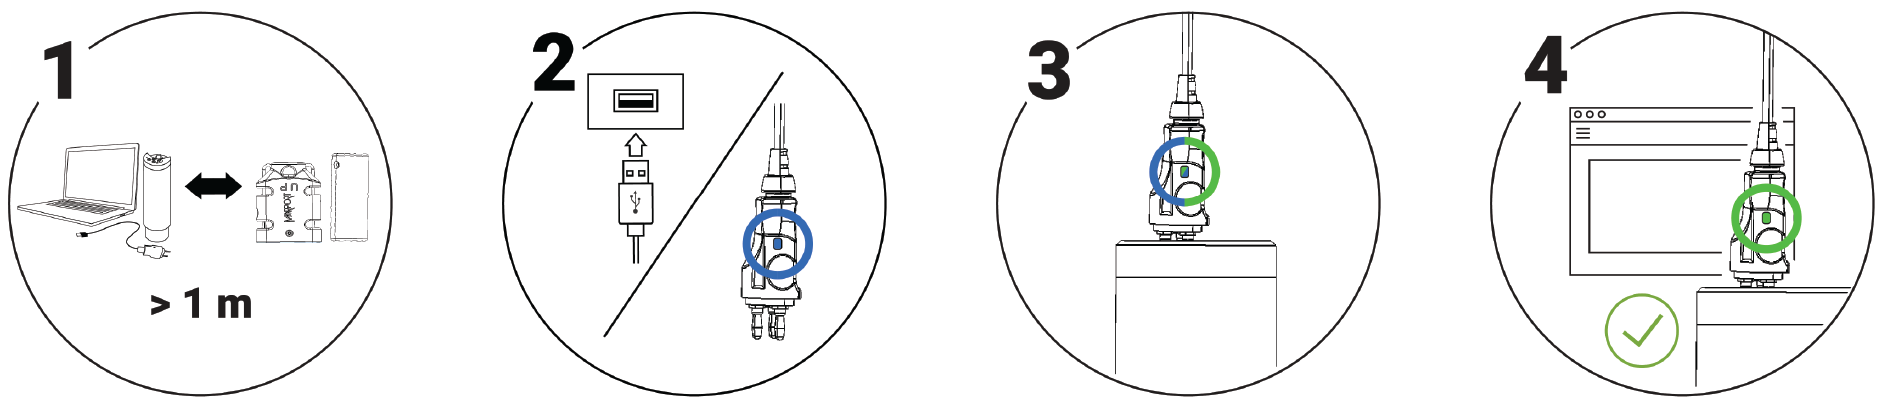
- Move other electrical devices minimum 1 m away from the computer.
-
Connect the USB connector directly to the
computer.
Mosa2 opens automatically and the startup wizard is displayed. The LED on the plug is solid blue.
-
Connect the three-pin plug to the sensor.
The LED on the plug blinks alternatively blue and green.
-
Wait a few seconds. The configuration page of the
sensor is displayed on Mosa2.
The LED on the plug is solid green.
Example
What to do next
Note: You can keep the Configuration Cable continuously connected by USB, and virtually eject or connect it. When no
sensor is connected to the Configuration Cable, click Menu  > Eject Config Plug or Connect Config
Plug. When
ejected, you come back to the discovery page. It stays disconnected until you
virtually connect to it or manually disconnect then connect it.
> Eject Config Plug or Connect Config
Plug. When
ejected, you come back to the discovery page. It stays disconnected until you
virtually connect to it or manually disconnect then connect it.