
Connecting the Sensor to Mosa2 via the Dock
Connect the sensor to Mosa2 when it is charging or by connecting a Configuration Cable to the Dock.
About this task
| Type of connection | Compatible hardware | |||
|---|---|---|---|---|
| A1 | A2S Gen 2 | A2S Gen 3, A2S Gen 4, A2H | ||
| Configuration Cable connected to Dock (Revision 1 and 4) | Yes | Yes | ||
| Configuration Cable Revision 3 connected to Dock | Yes | |||
| Dock charger plug | Yes | |||
Note: Refer to the label on the Configuration Cable to identify its revision number. Also
note that the Configuration Cable Revision 3 and Revision
4 have an M logo on the plug  .
.
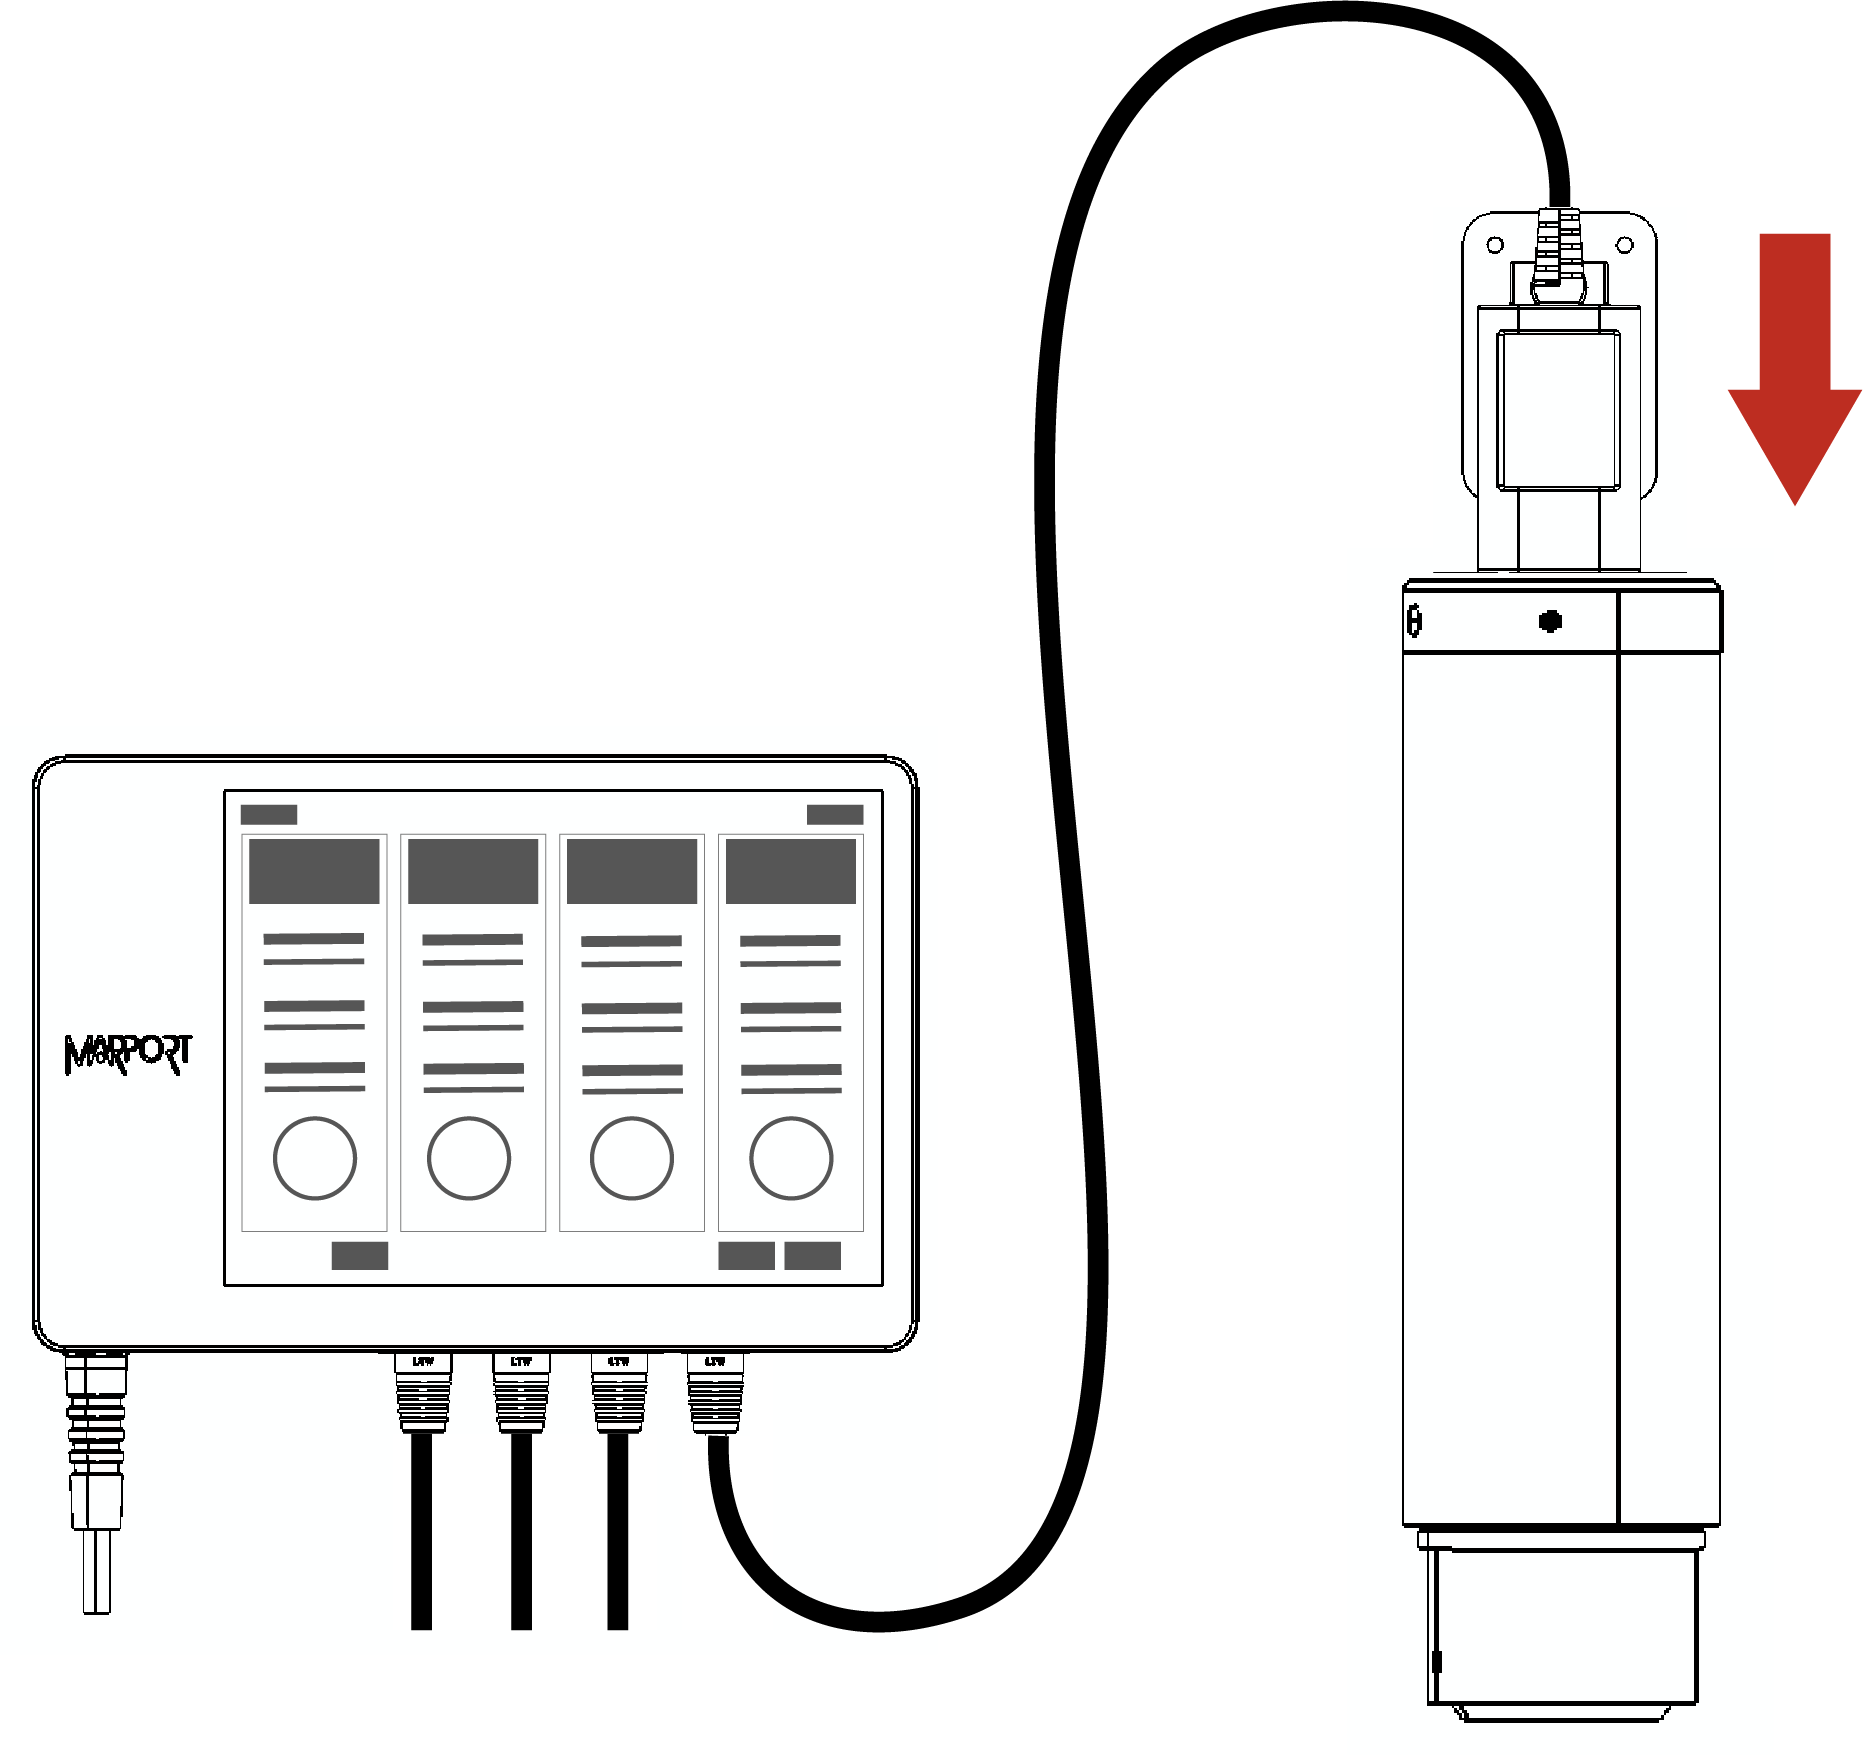
Using a Dock Charger Plug
About this task
Important: Only Pro line of sensors with an A2S PCBA revision 03 and later, and A2H PCBA
can connect to Mosa2 via the Dock using the charger plug.
Procedure
-
Connect one Dock charging plug to the
sensor's endcap.
-
Mosa2 discovery page opens. The
sensor is displayed.
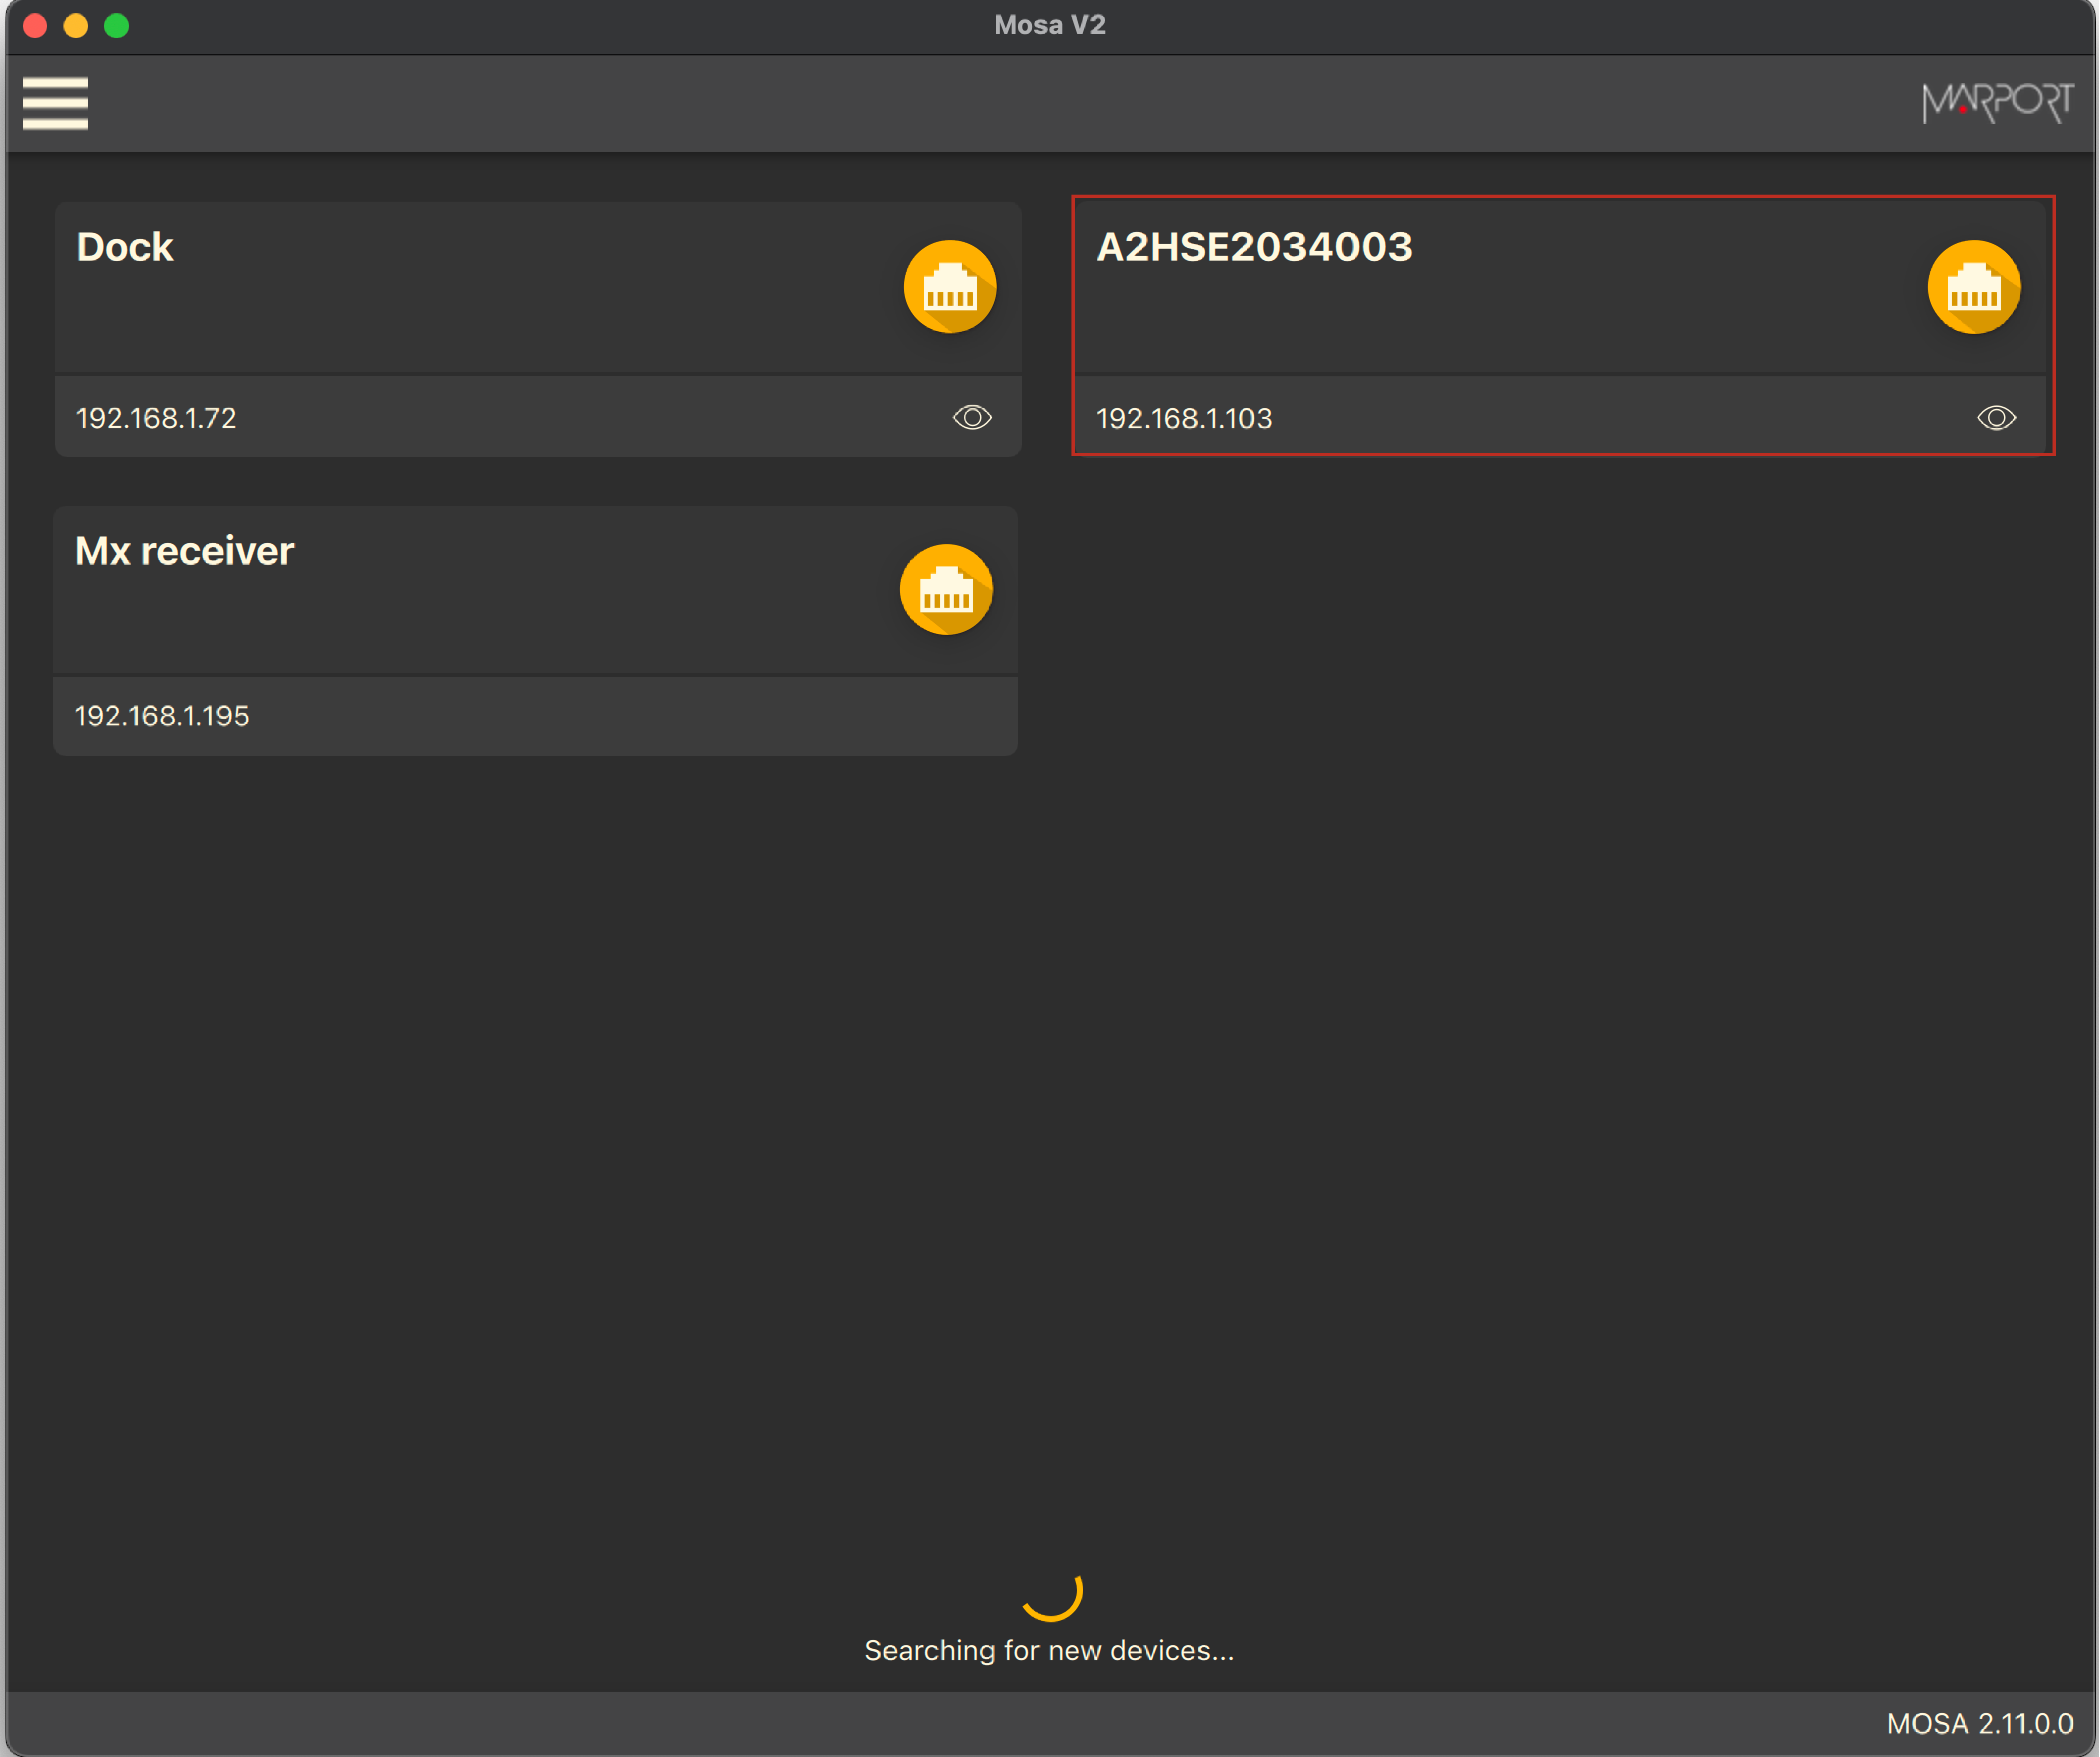
- Click
 to open the
sensor configuration page.
to open the
sensor configuration page. - Click
 to show the
deploy animation on the charger plug for 30
seconds.
to show the
deploy animation on the charger plug for 30
seconds.
- Click
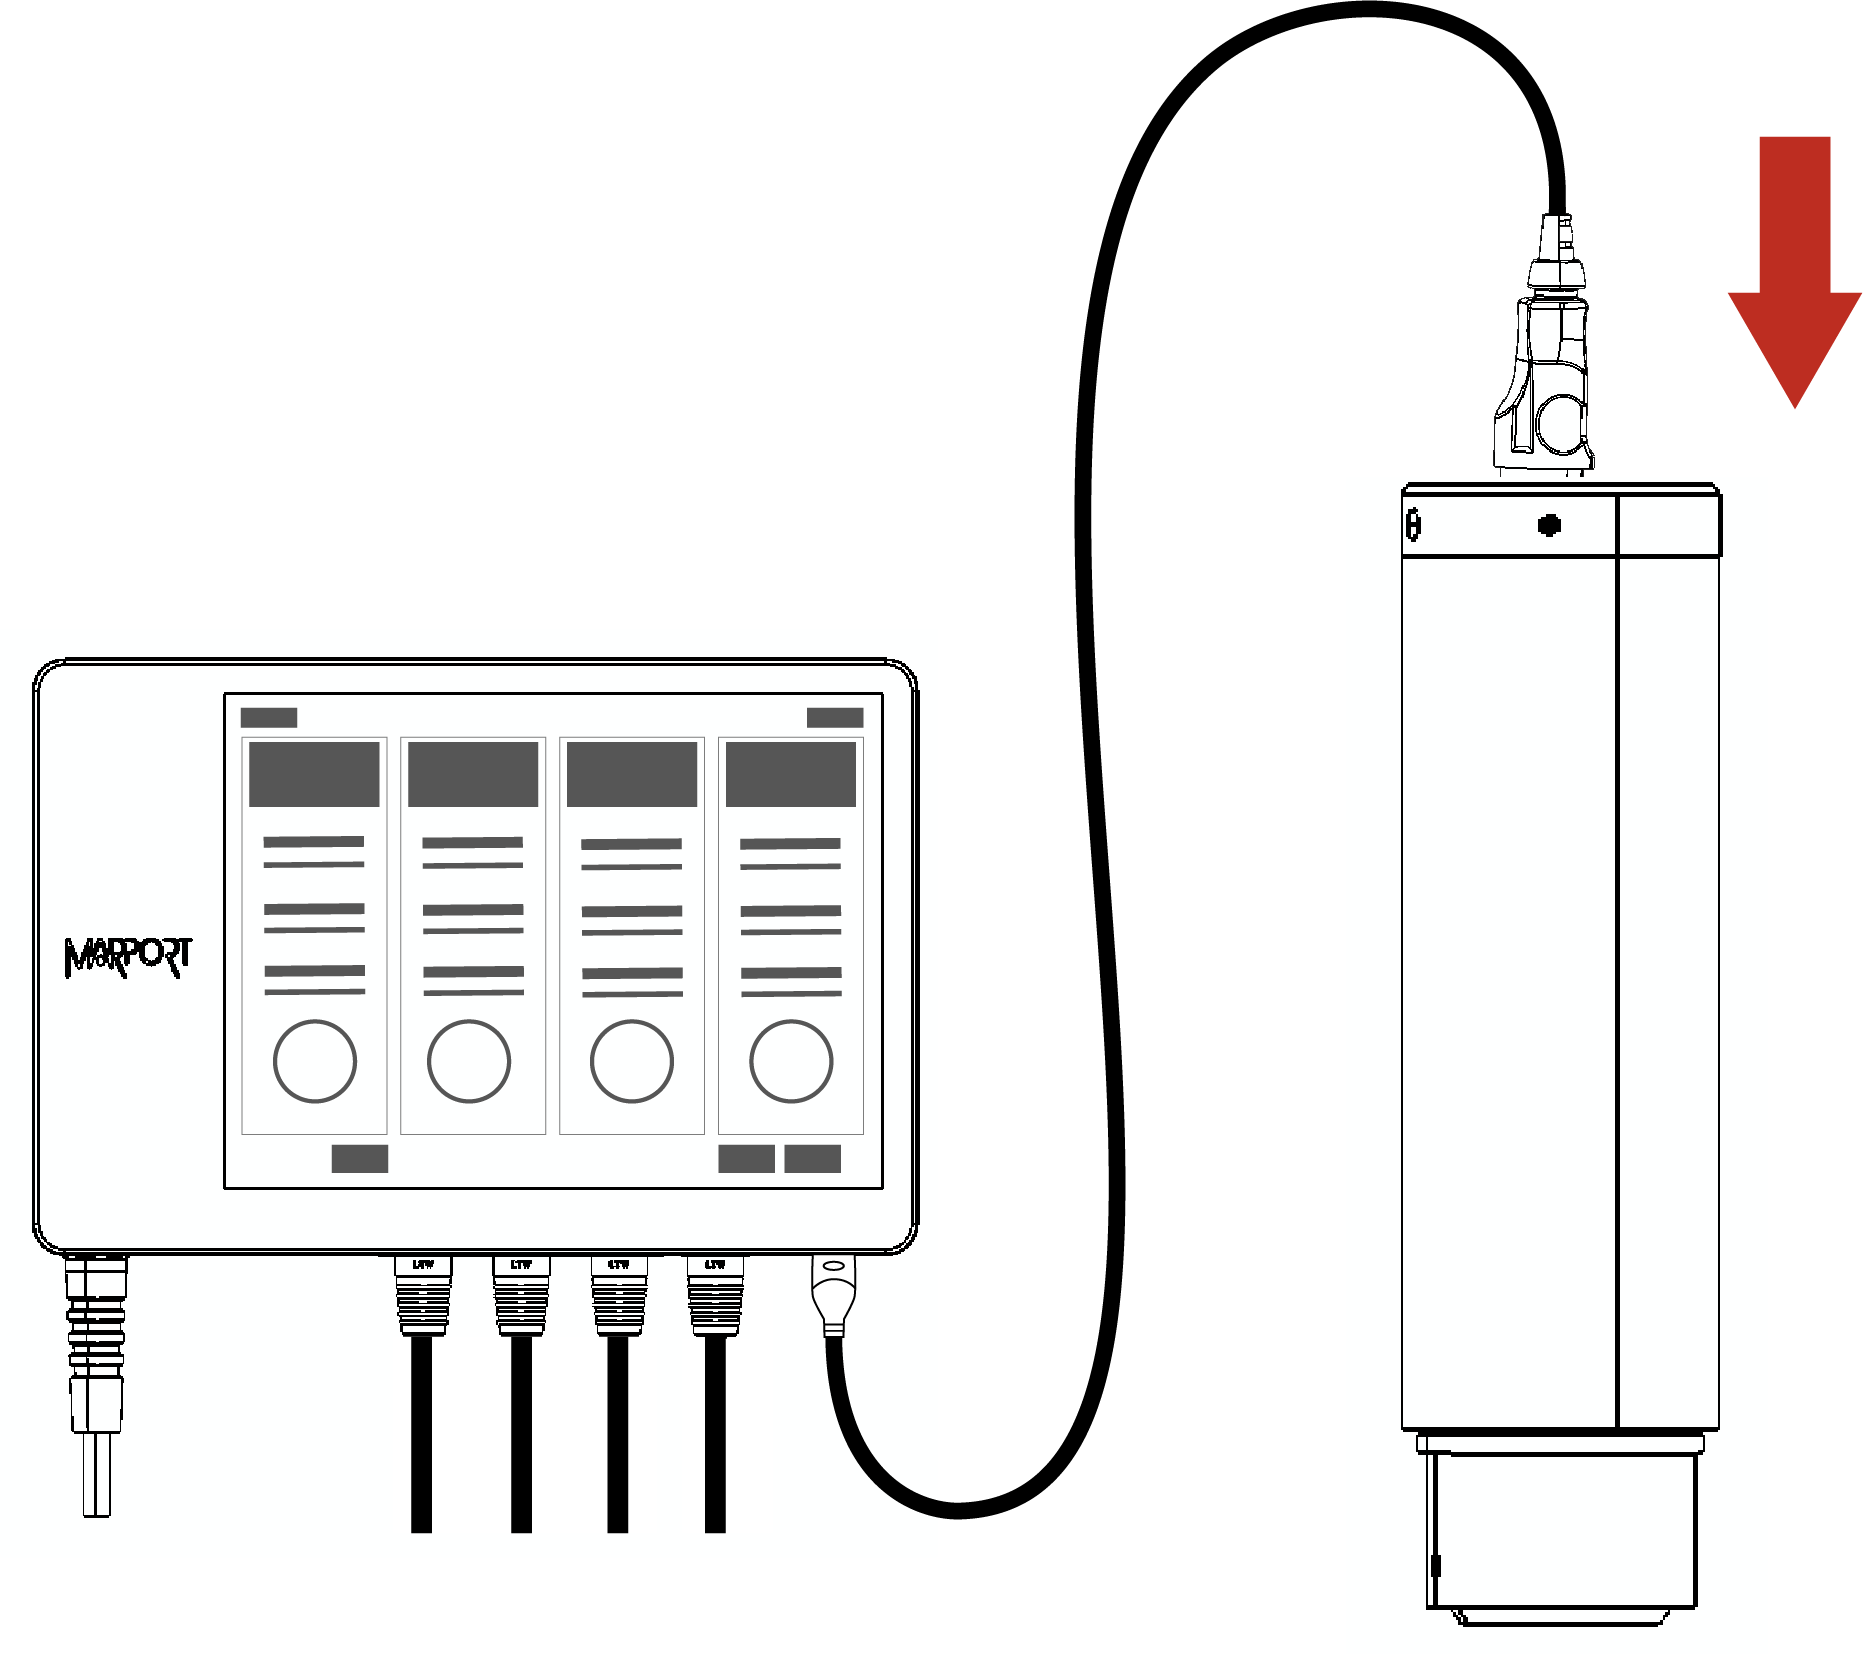
Using the Dock and a Configuration Cable
About this task
Note: Compatible with Mosa2 02.11.x and above.
Important: Only sensors with
an A1 PCBA and A2S PCBA revision 02 can connect to Mosa2 via the Dock using the Configuration Cable. For the Pro line of sensors, use the
charging plugs of the Dock.
Note: The firmware of the sensors with A1
and A2S rev02 PCBA cannot be updated with this type of connection, use a
wireless connection instead.
Procedure
-
Connect the USB connector of the Configuration Cable
to the Dock and the plug to the sensor's
endcap.
-
Open Mosa2. The Configuration Cable is displayed on the discovery
page.
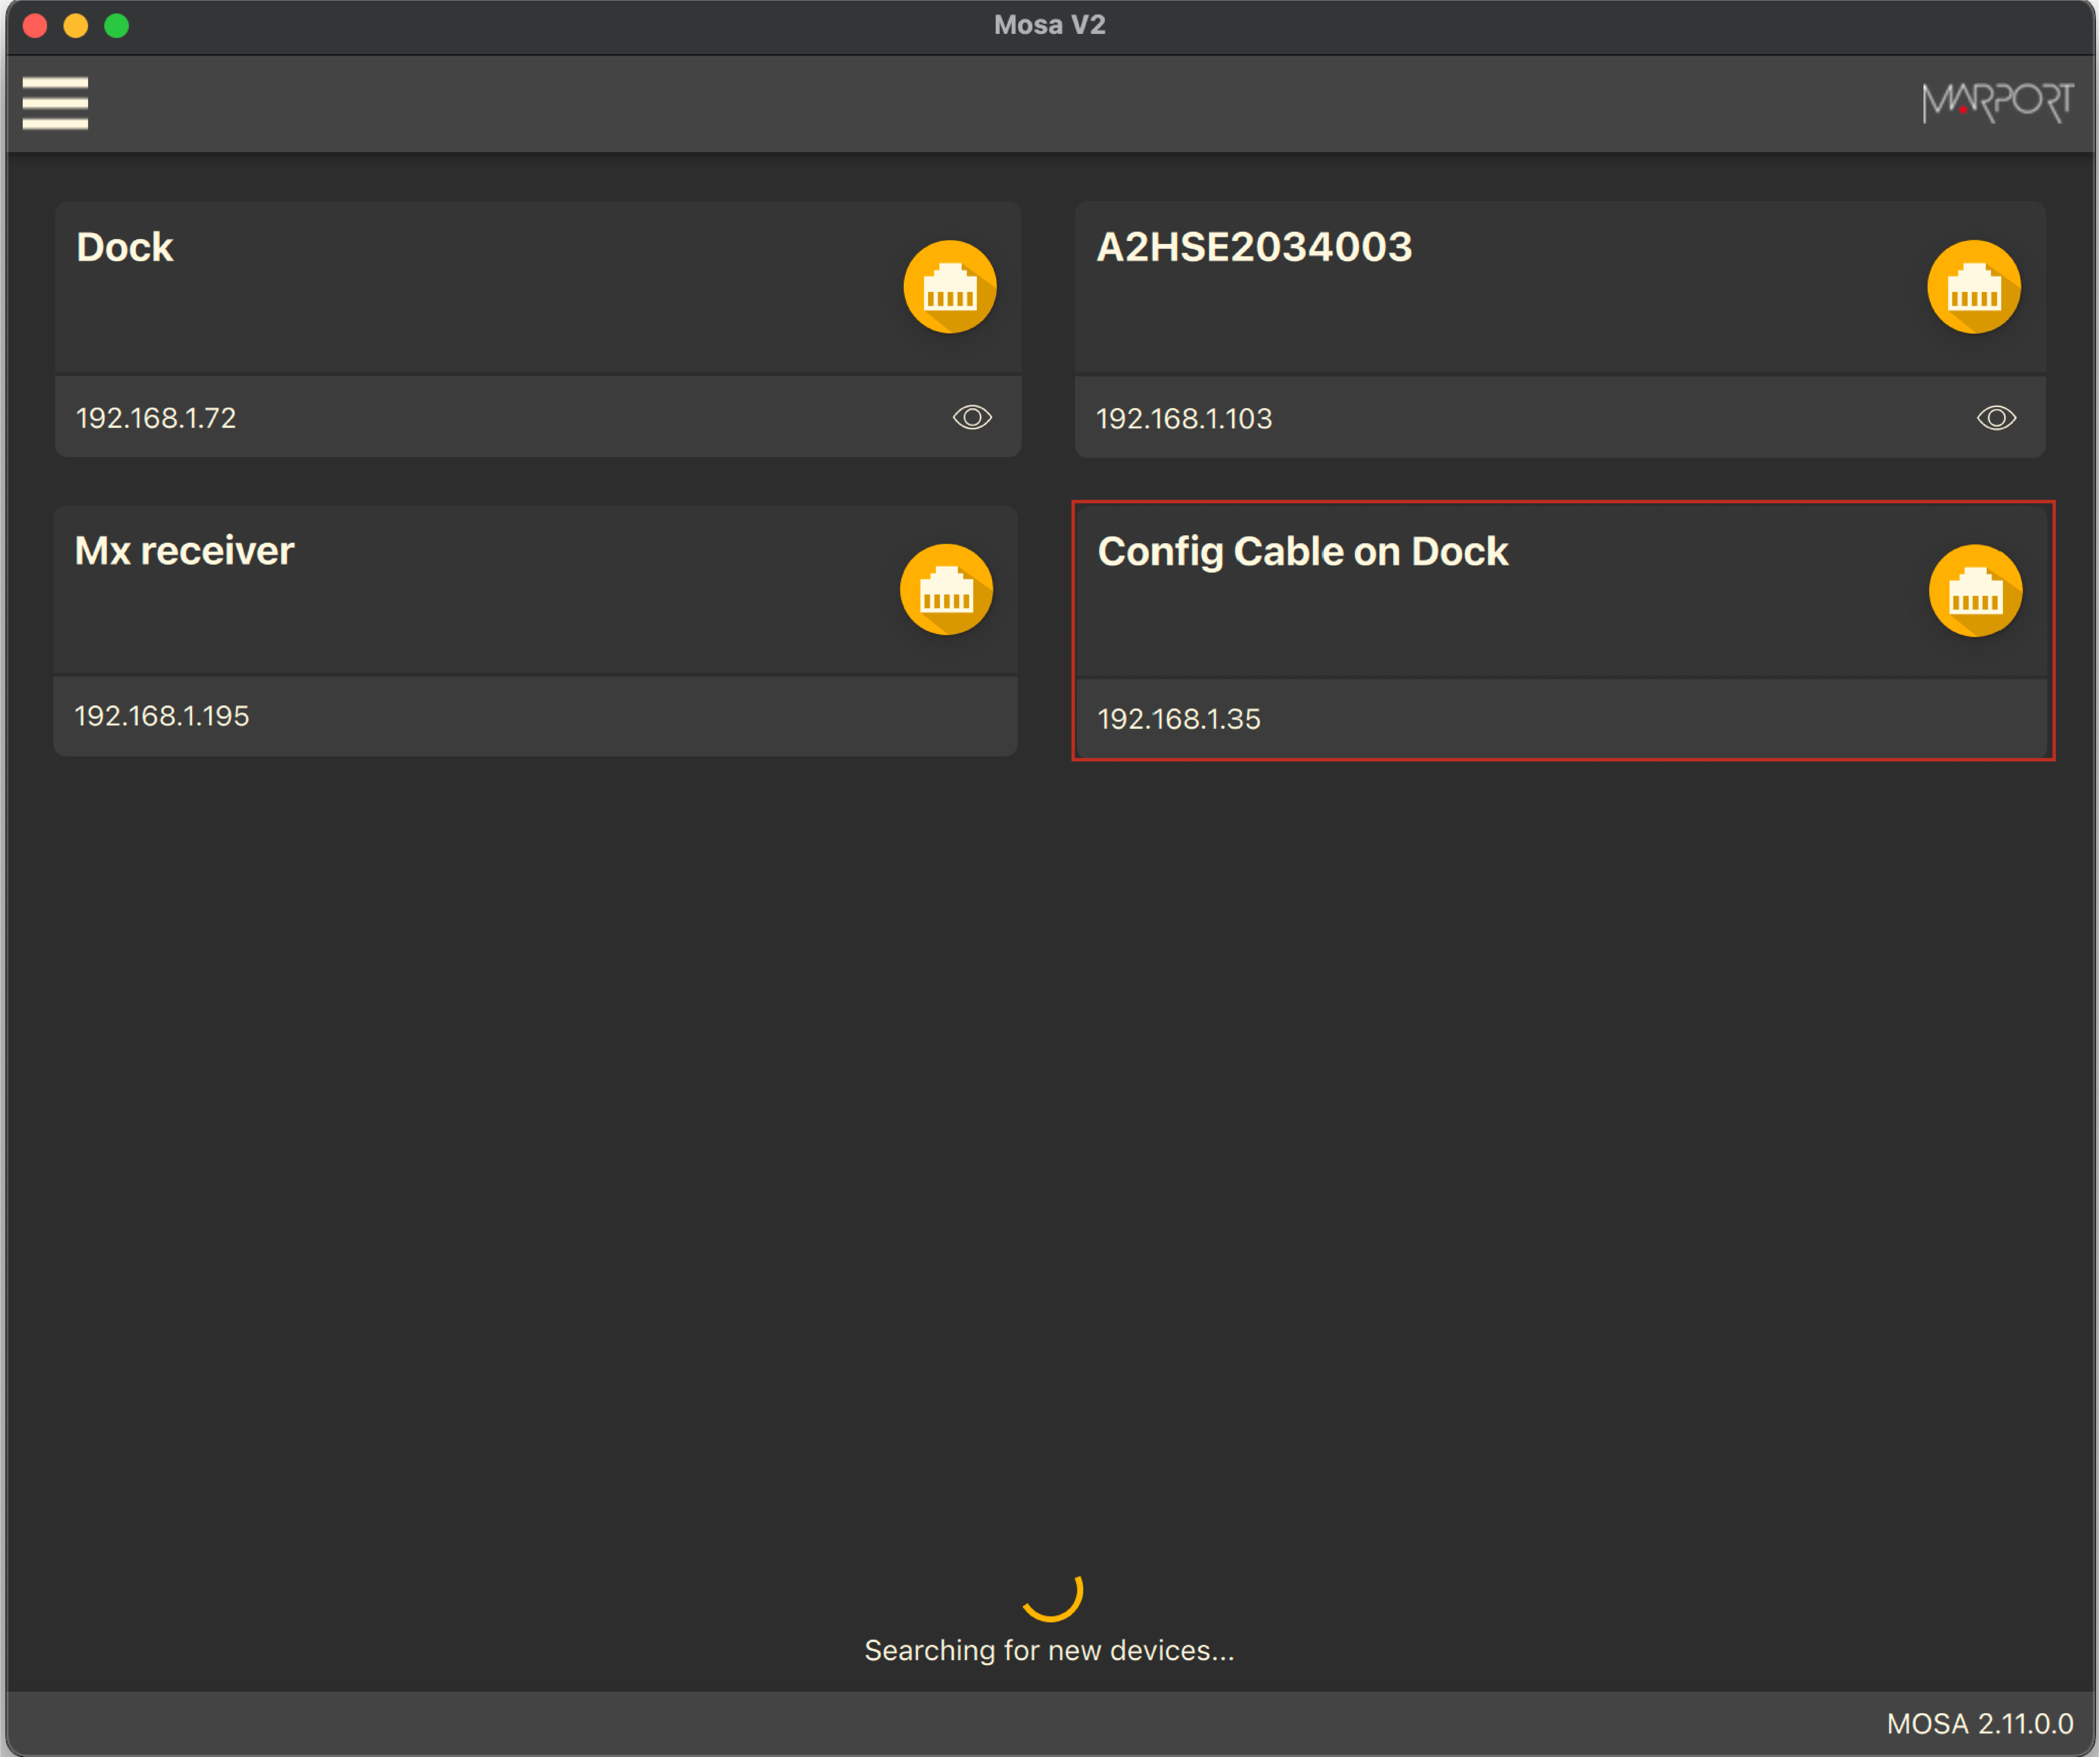
Click to open the
sensor configuration page. -
To leave Mosa2 configuration
page and come back to the discovery page, click
 > Disconnect.