Connecting the Sensor to Mosa2
To configure the sensor, you need to connect it to Mosa2.
About this task
- External WiFi network: the sensor connects to a WiFi network that is defined in the sensor's configuration settings. This WiFi network (such as the vessel internal network) must be set up in DHCP and not manually (fixed IP). Otherwise the sensor cannot connect to it. The sensor will only be able to connect to Mosa2 as a WiFi access point.
- Access point: the sensor turns itself into a WiFi access point.
In production, boards are loaded with a default WiFi network setting. If this default network is not changed and sensor cannot find it, the sensor automatically switches to access point mode after 2 minutes. You can configure your sensor to be in access point mode from start up by removing the network preferred SSID in the settings.
Procedure
-
Open Mosa2.

-
Put the sensor in WiFi mode to be able to configure it:
-
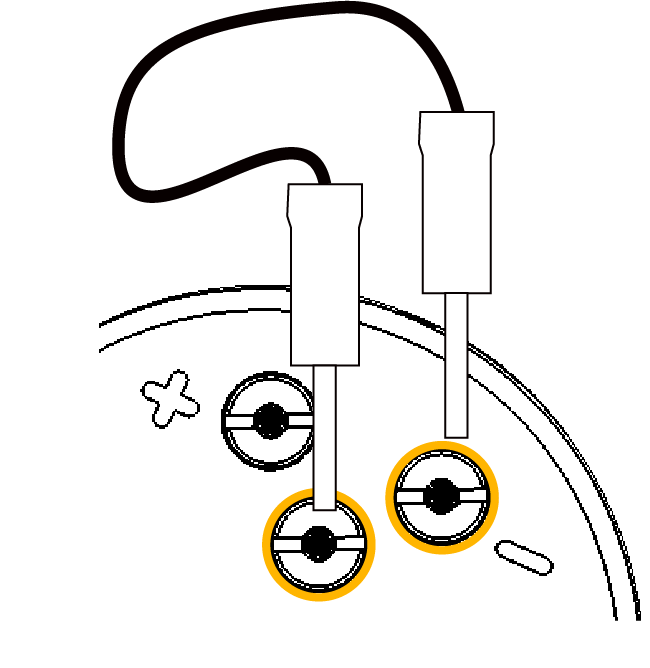
Connect the water-switch. The LEDs flash red.
Note: When in WiFi mode, the sensor automatically turns off 10 minutes after the last configuring action. You should keep that in mind when configuring it. -
Connect the water-switch. The LEDs flash red.
-
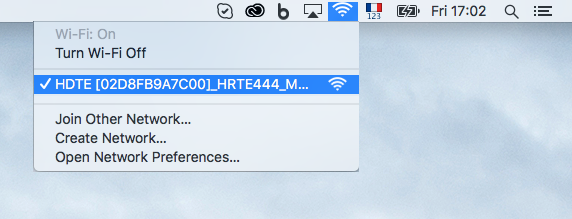
From the top toolbar of your computer, click the WiFi icon and:
- If the sensor is a WiFi access point, select the sensor name:
- If the sensor is configured to connect to a WiFi network, ensure your computer is connected to this network.
- If the sensor is a WiFi access point, select the sensor name:
-
From Mosa2, click the tab HDTE Sensors.

-
Wait a few seconds for the sensor to be recognized, and from the left panel,
click Available Inputs.
The sensor name is displayed under Available Inputs.
Figure 1. HDTE connected as WiFi access point 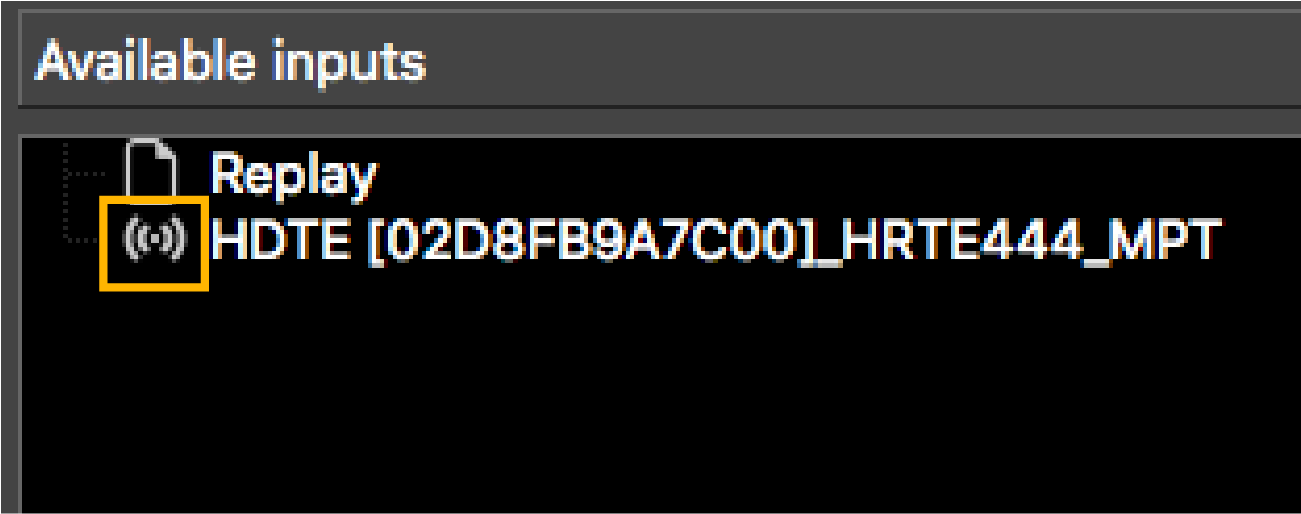
Figure 2. HDTE connected to WiFi network  If the sensor is not displayed click Refresh inputs from the right side of the screen.
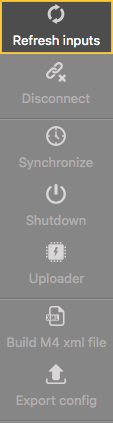
-
From Available Inputs, click the sensor name.
Sensor data and settings are displayed.
-
If the following message appears at the bottom of the screen, click
Synchronize from the right side of the screen.
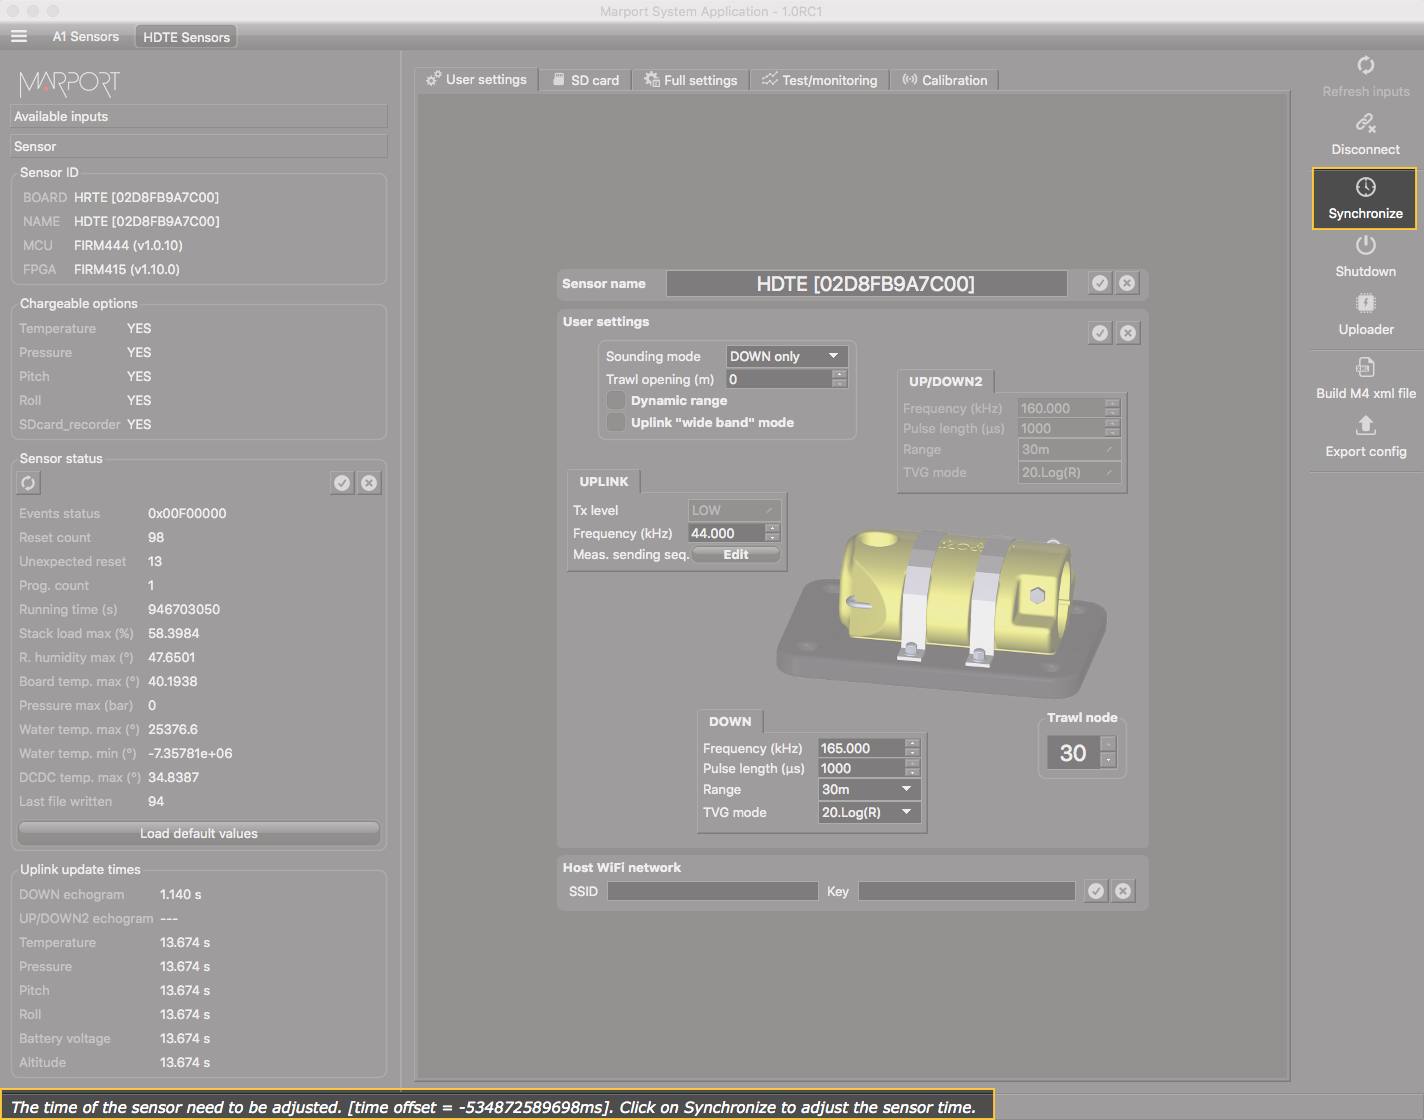 This synchronizes the HDTE time to your computer time. This way, when you read data coming from the SD card of the HDTE, you will have the correct time.