Configuring Uplink, Up and Down Settings
You can configure different settings for uplink, down and up sounding.
Before you begin
About this task
| Always click Apply after you change settings. | Click the cross sign to come back to the last saved configuration. |

|

|
Procedure
From the top of the screen, click the tab User
settings.
Uplink
Procedure
-
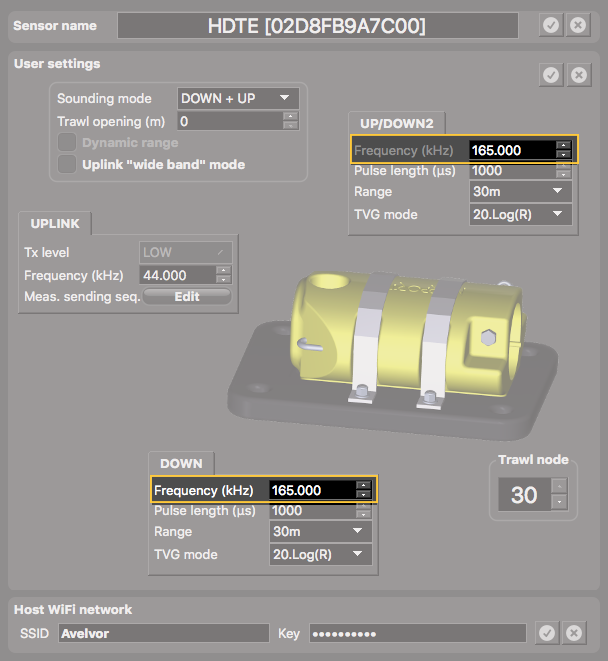
From , enter a frequency for the signal toward the vessel.
 Important: This parameter must be the same in the sensor settings in Scala2.
 -
Select Uplink "wide band"
mode if you want to have higher resolution data.
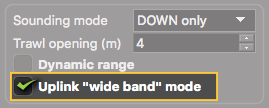 Note: Wide band mode uses a bandwidth of 2400 Hz instead of 800 Hz for the normal mode. Be sure to allow a frequency interval of min. 200 Hz with other sensors.
 -
From Trawl node you can define the sensor location
on the trawl, according to node numbers (See Installing a an HDTE on the Trawl to know
which nodes are appropriate). Defining a trawl node is not necessary but if
you do, make sure it is coherent with the node you will define in Scala2. We recommend you to choose: 7, 8 or 9 for a mounting on the tunnel, and
10, 11, 12 or 13 for a mounting on the headrope.

Up / Down Soundings
About this task
Procedure
-
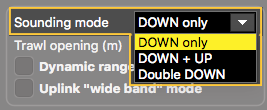
Select a sounding mode (see Sounding Modes for more
information).
-
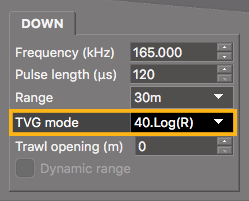
To change the down and/or up frequencies, from
UP/DOWN2 and DOWN, choose
a frequency from Frequency (kHz). You can choose the
same frequency for up and down soundings because they do not emit at the
same time.
 Important: If you change up/down frequencies on a sensor calibrated for target strength, you need to calibrate the sensor again because ping frequency is an important setting for the calibration of the sensor.
 -
From UP/DOWN2 and DOWN >
Range, select the range according to how many
meters you want to see under the sensor.
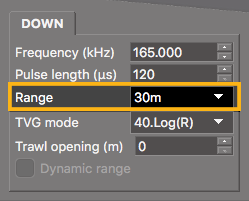
- If you need to see the bottom and the trawl going down (e.g. bottom trawling), you can put the maximum range: 30 meters.
- If you need to see the trawl opening (e.g. pelagic fishing), you can put a small range, such as 5 meters.
- If you are using DOWN only sounding mode and you want the range to adapt automatically to the bottom detected, see Configuring Autorange for details.
Note: The range influences the display of echogram images. When the range is short, data can arrive quicker, which gives better quality images. But the bigger the range is, the lesser the image quality is, because data arrives slower. If you are using Down 1 + Up or double down sounding, the image quality is even lower, as explained in Sounding Modes. -
From UP/DOWN2 and DOWN >
Pulse length (μs), select a pulse length
according to the distance at which you need to detect fish:
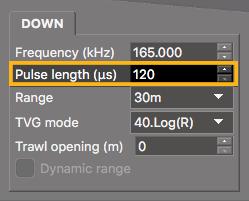
- Fish detection between 20 cm and 4 m, enter 120 μs
- Fish detection between 50 cm and 30 m, enter 1000 μs
-
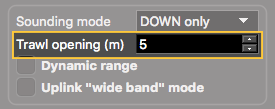
Change the distance in Trawl opening only if you use
autorange mode (see Configuring Autorange).
Echogram Settings
Procedure
-
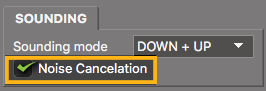
To improve the echogram when there is some noise around the sensor, from
SOUNDING select Noise
Cancelation (firmware version FIRM444-V01.00.14 and
later).
-
Select a TVG mode to have targets or sea bottom displayed in the same color
on the echogram, whatever the distance from the sensor. See About Time Variable Gain to know which mode you should choose.
-
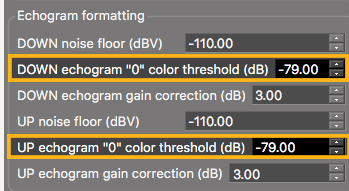
If you need to better see small targets on the echogram, you can change the
color threshold of the echogram for down or up soundings:
- From the tab Full settings, click Advanced settings.
-
From echogram "0" color threshold, enter
-79.
-
Click validate below Advanced
Settings.